
BMW High Spot Repair San Diego: When “Impossible” Just Needs the Right Technique
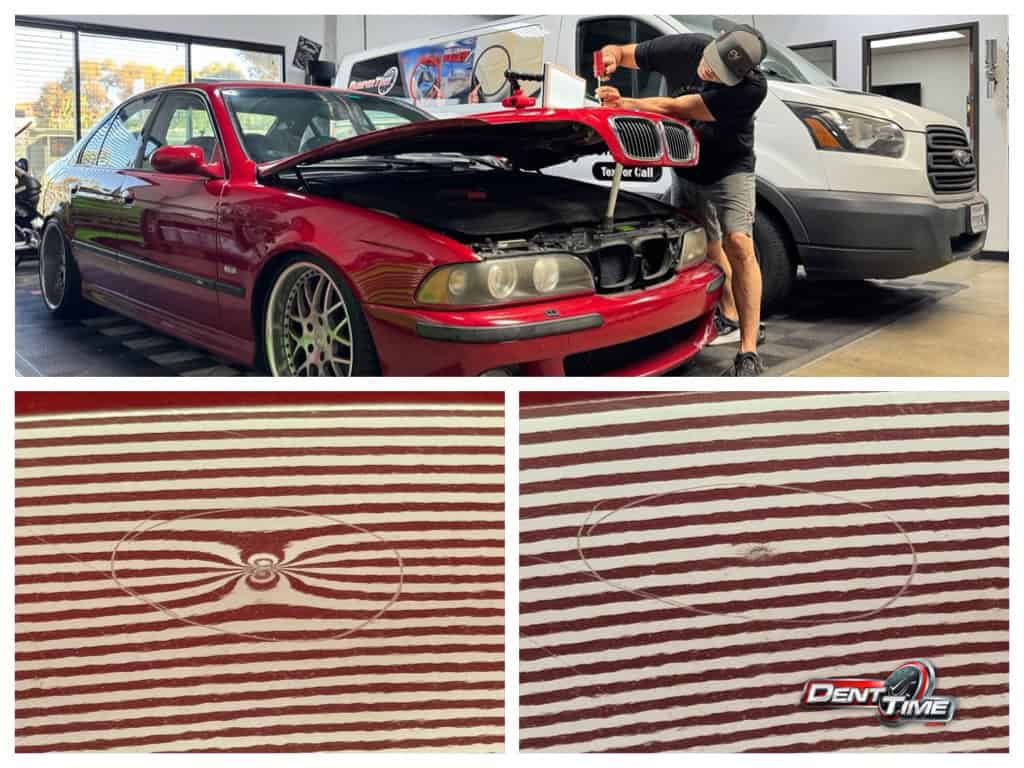
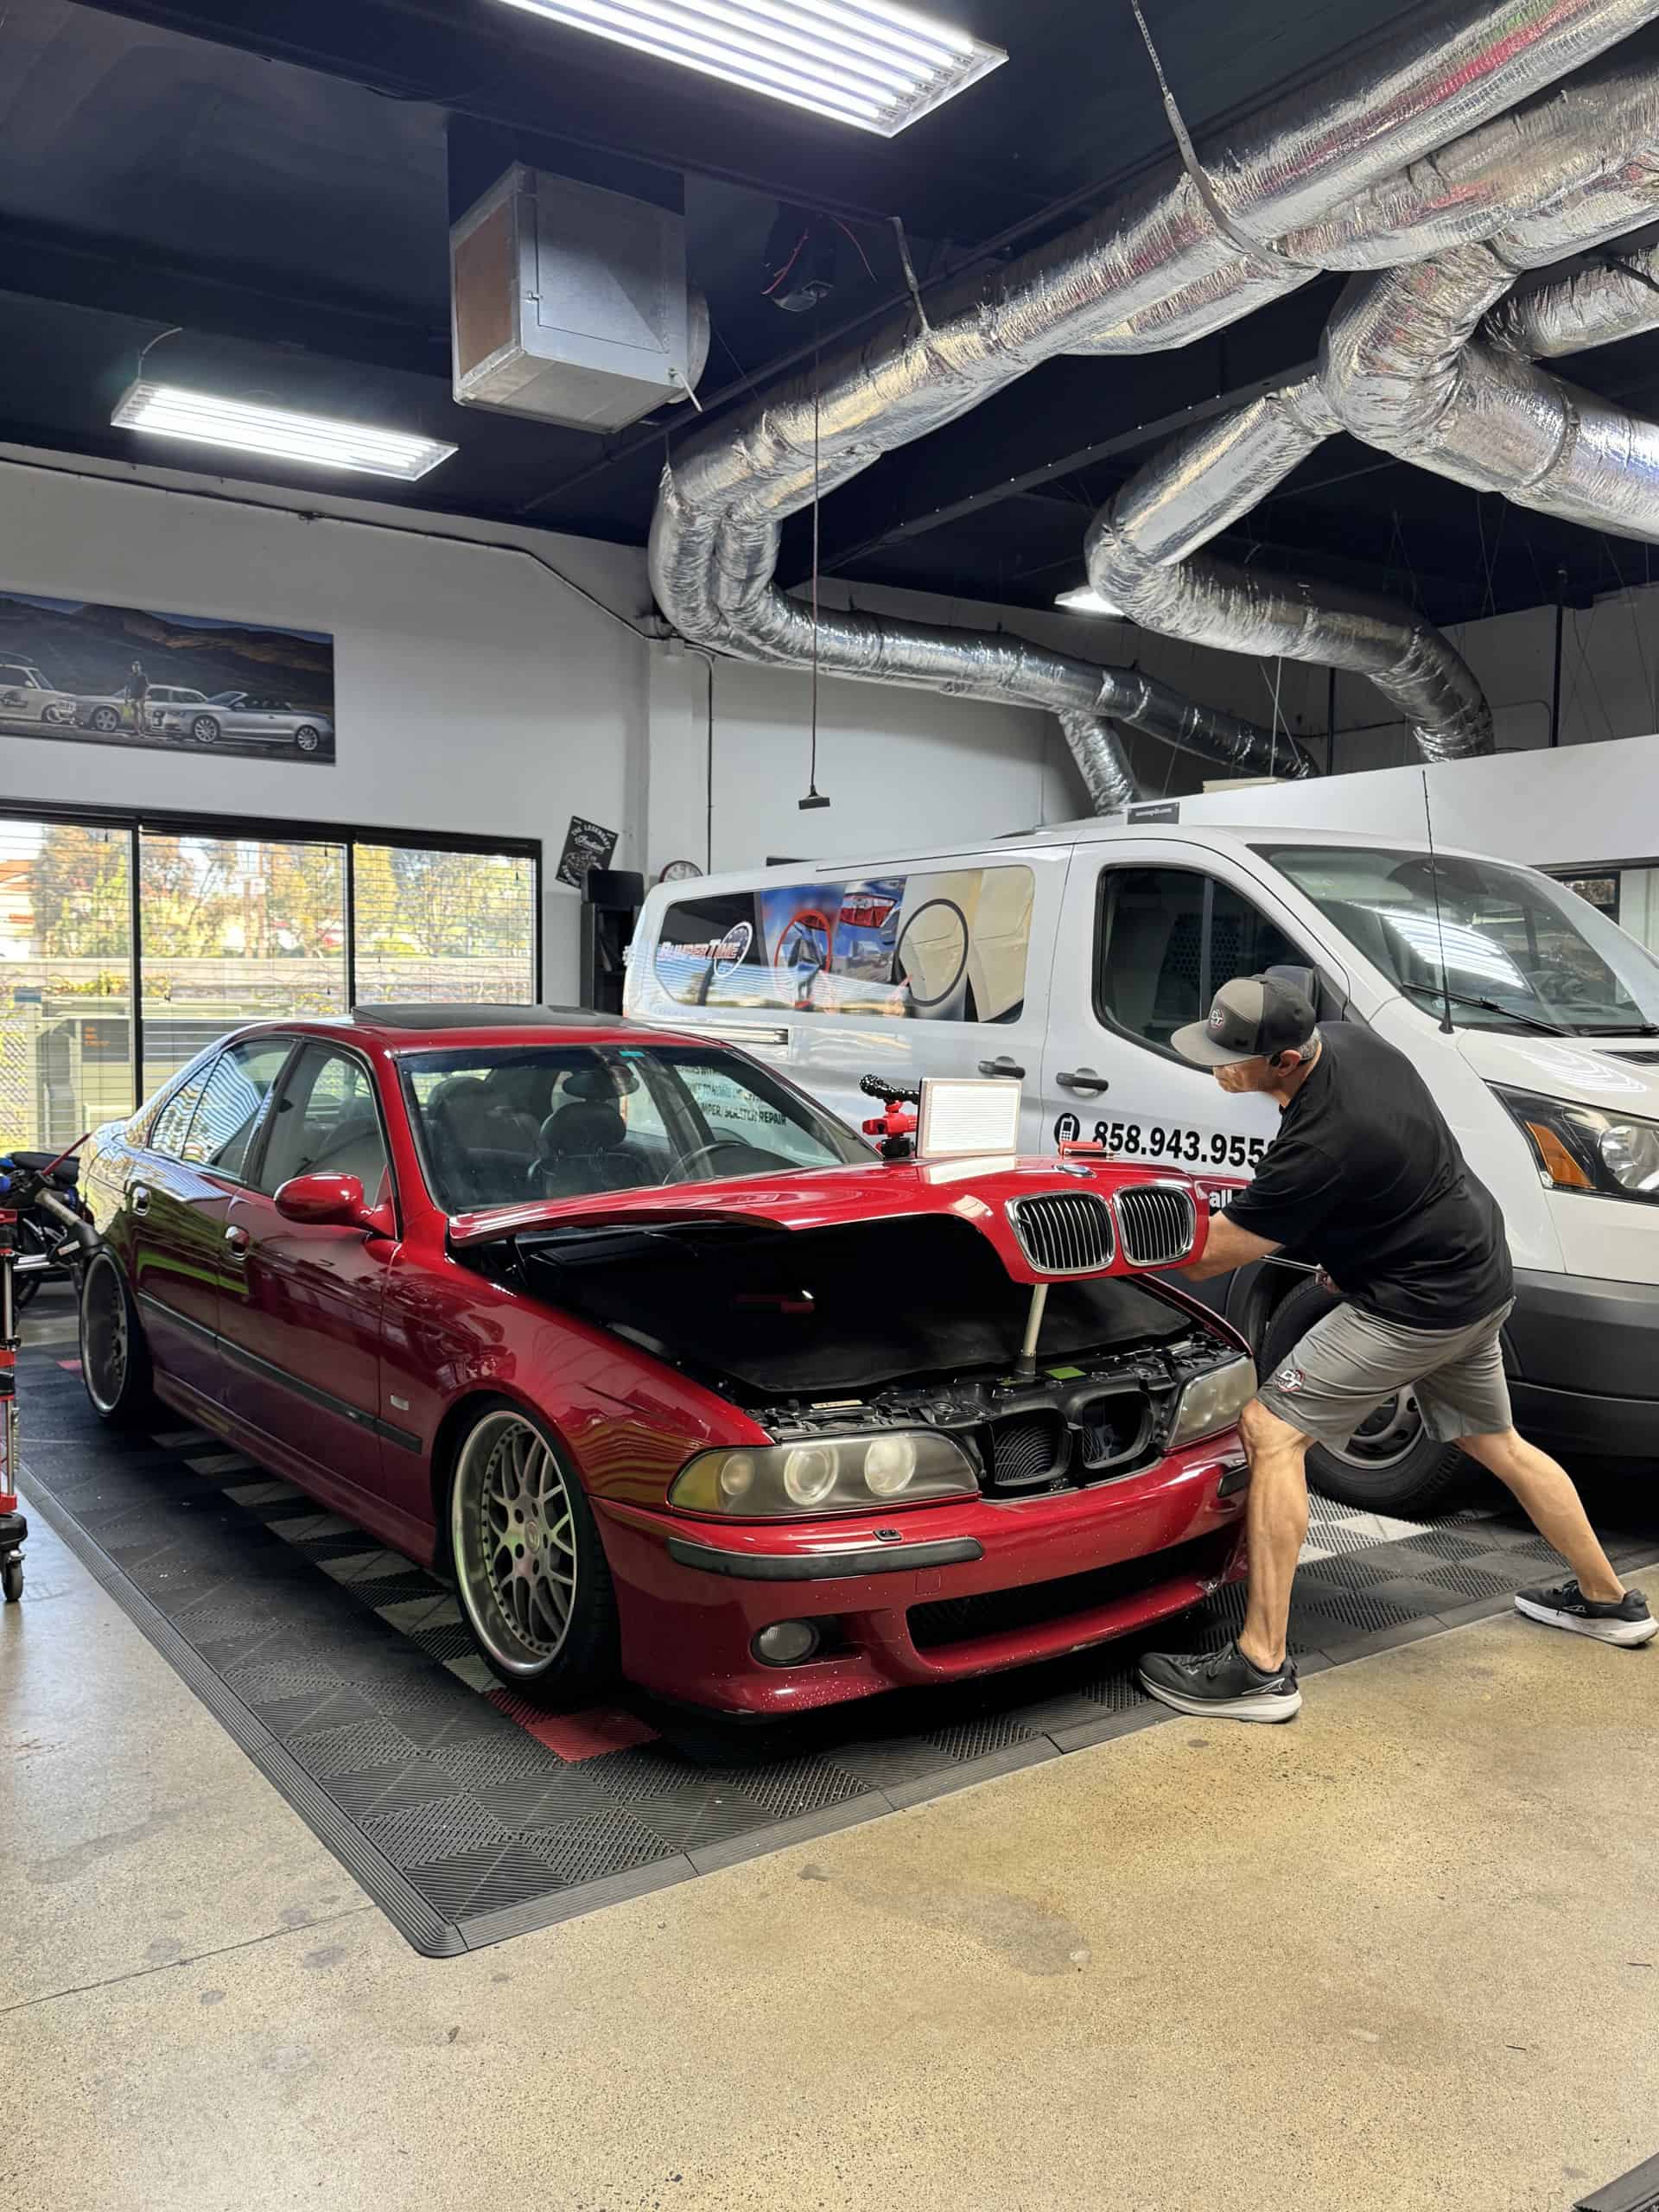
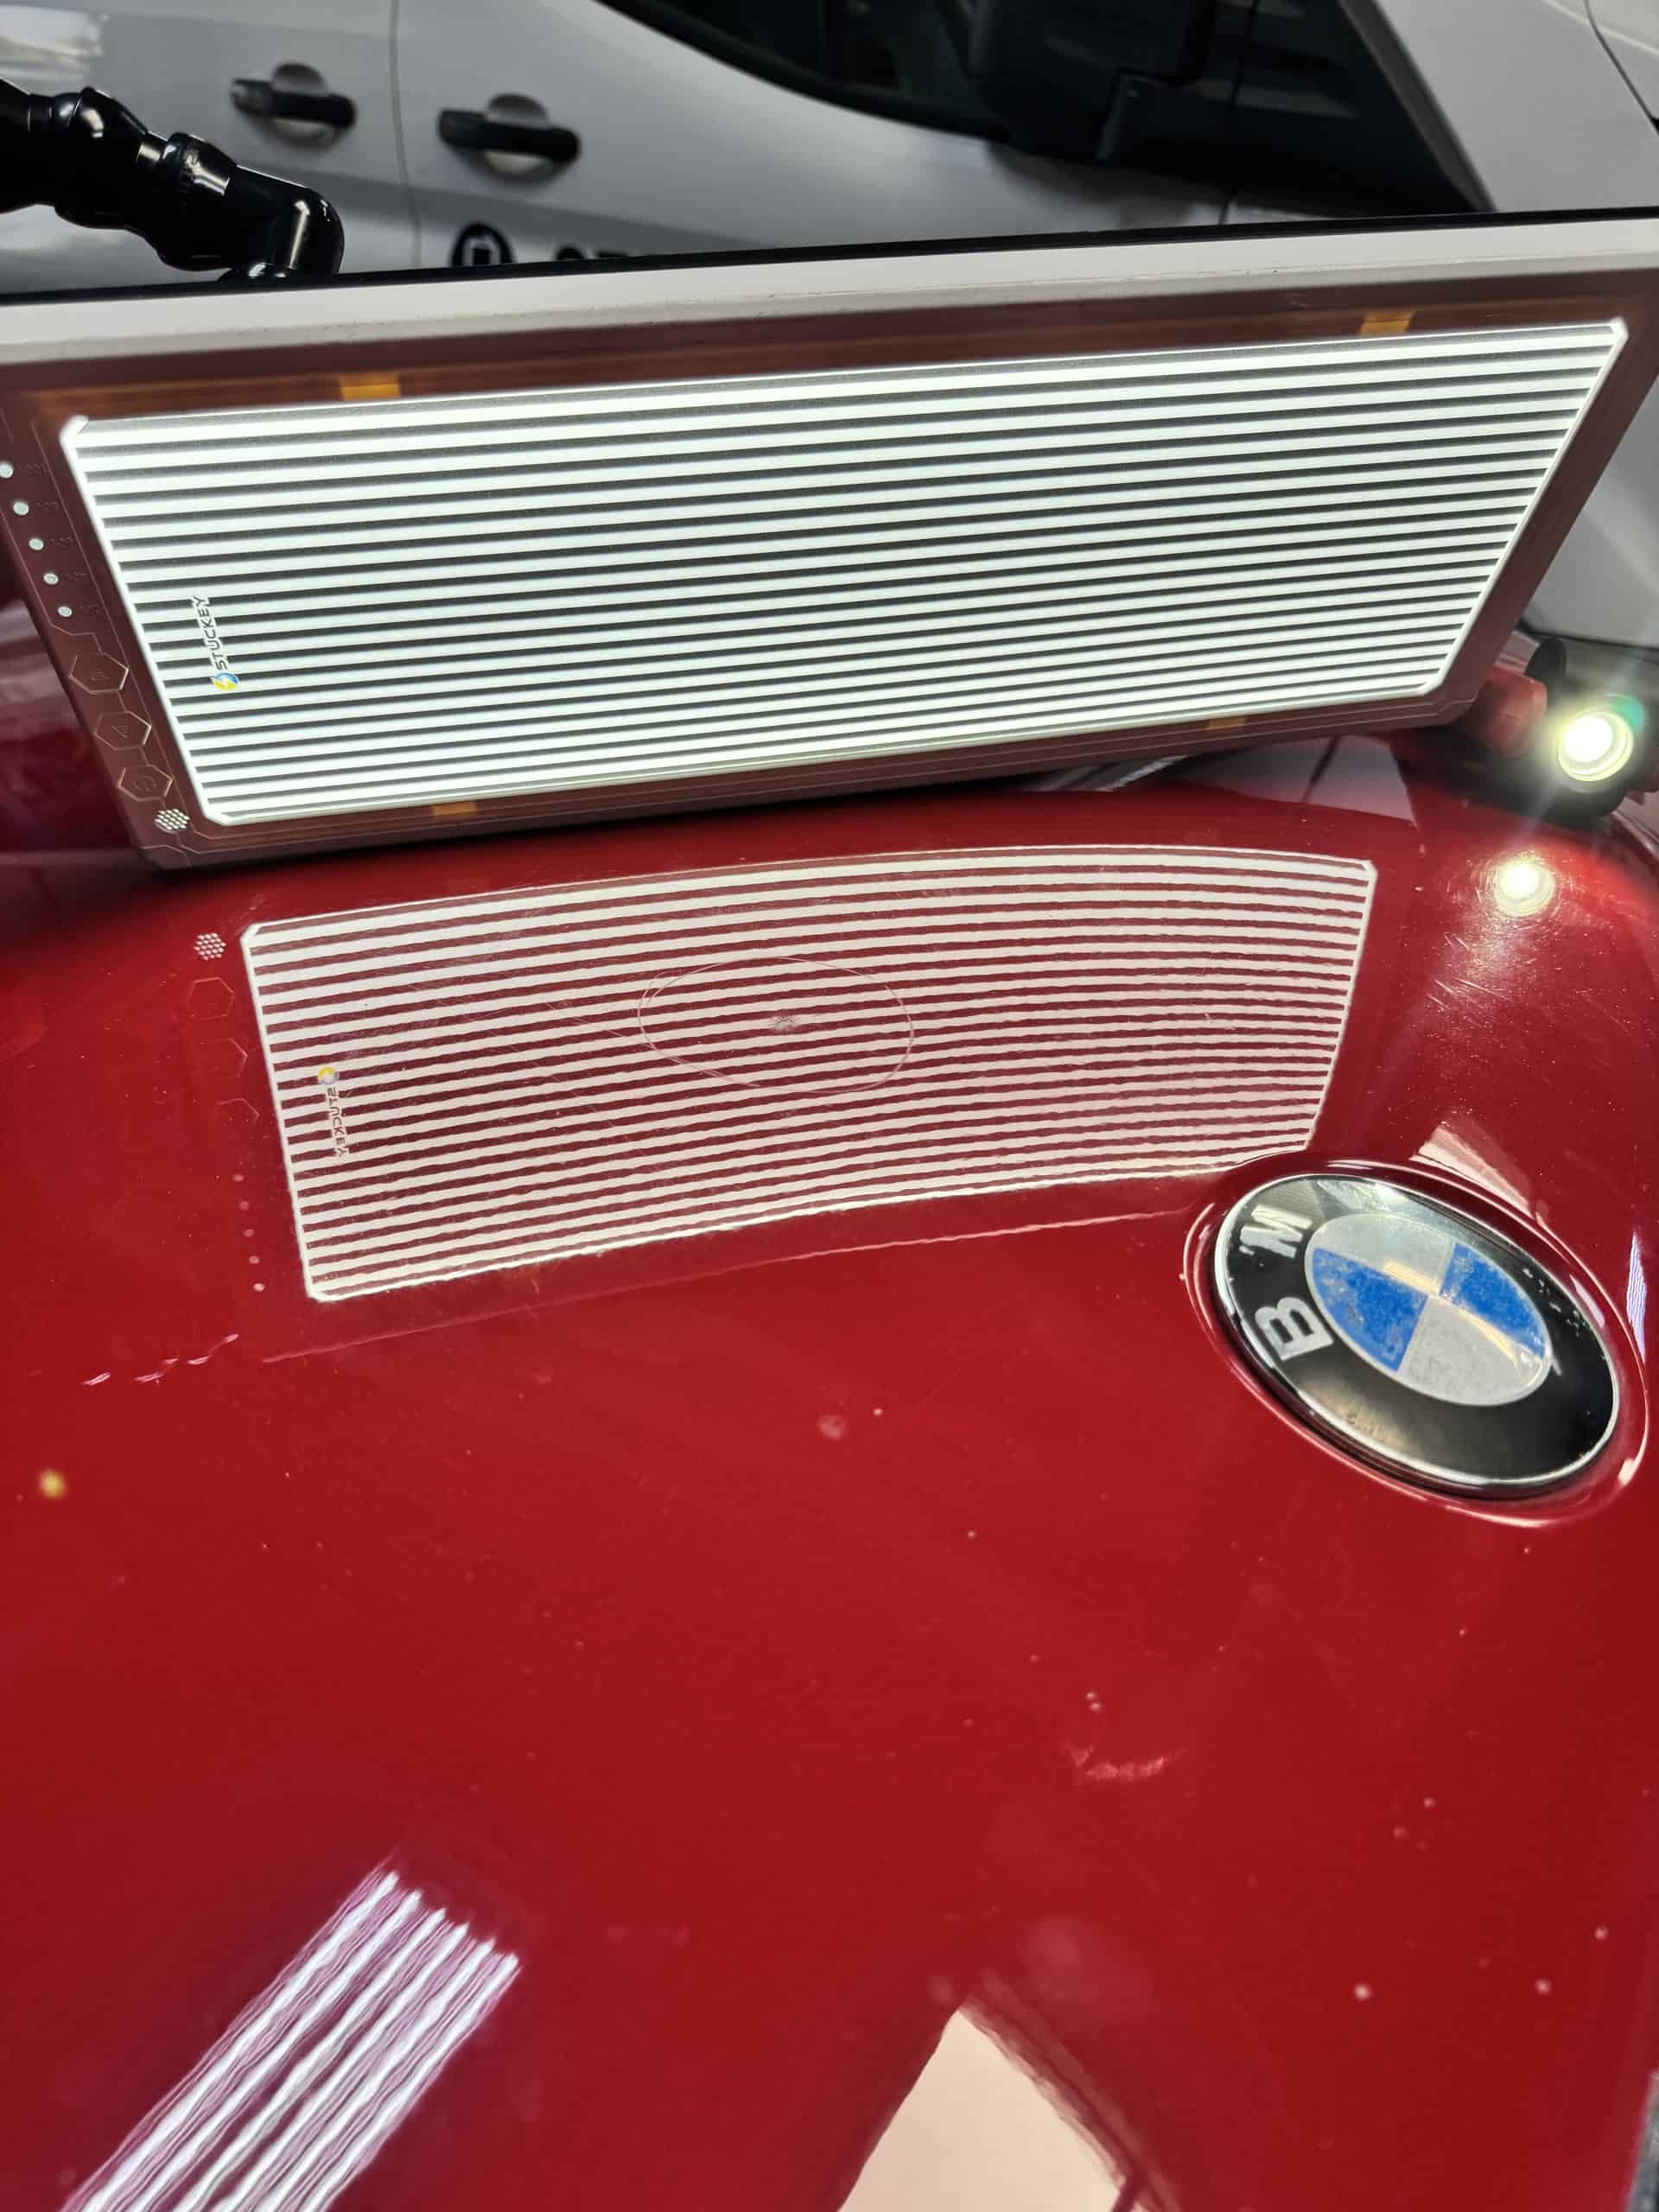
BMW M5. Hood. Severe upward impact from below.
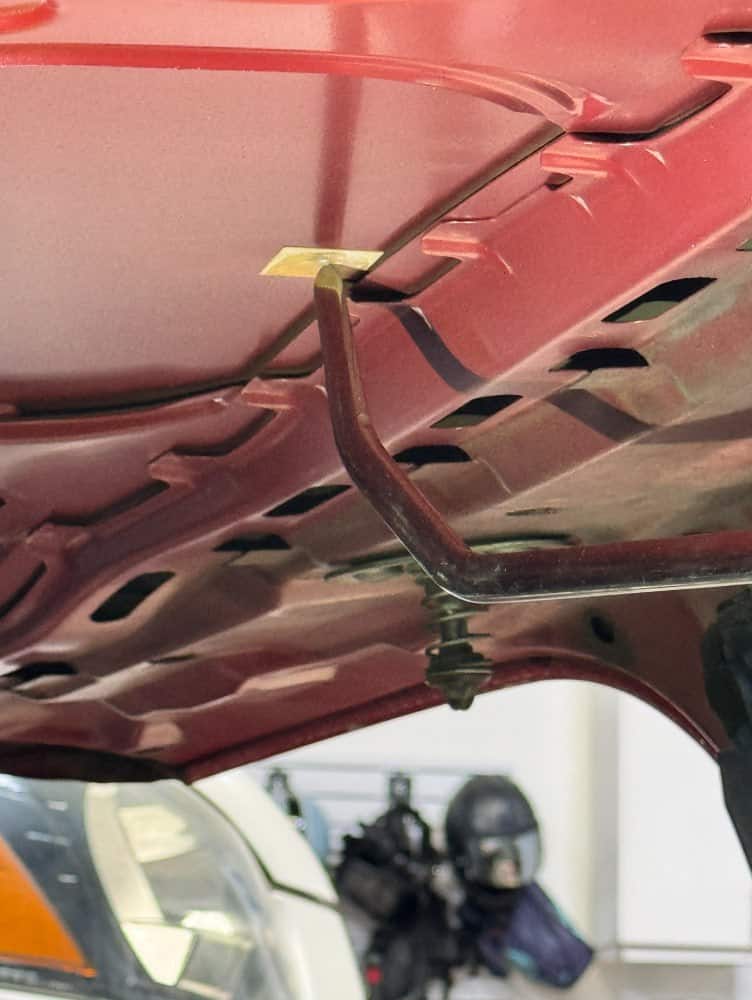
Something in the engine bay closed on a hard object — a bolt, a tool, something unforgiving. The impact punched the metal upward from underneath, creating a sharp high spot so severe it cracked and chipped the paint on the outer surface.
Most shops looked at this and saw a $2,000+ respray. The customer came to Dent Time hoping for a miracle but braced for bad news.
🎯 FOR CONSUMERS
What you’re seeing is called a “high spot” — metal pushed outward instead of inward. This is actually harder to fix than a typical dent because the metal is stretched and stressed from being crushed upward. The paint damage makes it even more complex.
The Assessment: Is It Even Fixable?
“I didn’t know if it was saveable,” Myke admits. “It was that badly hit. The only thing I could do was try.”
That willingness to attempt what others walk away from — that’s the Dent Time difference. Thirty-five years of PDR experience teaches you that “impossible” dents sometimes just need someone willing to work the problem and the technique to back it up.
The challenges:
- Severely crushed high spot (metal at its stress limit)
- Missing paint in the center (impossible to read reflection)
- Sharp edges that would tear remaining paint if worked incorrectly
- Risk of making it worse instead of better
The Repair: Step-by-Step Breakdown
Step 1: Creating a Readable Surface
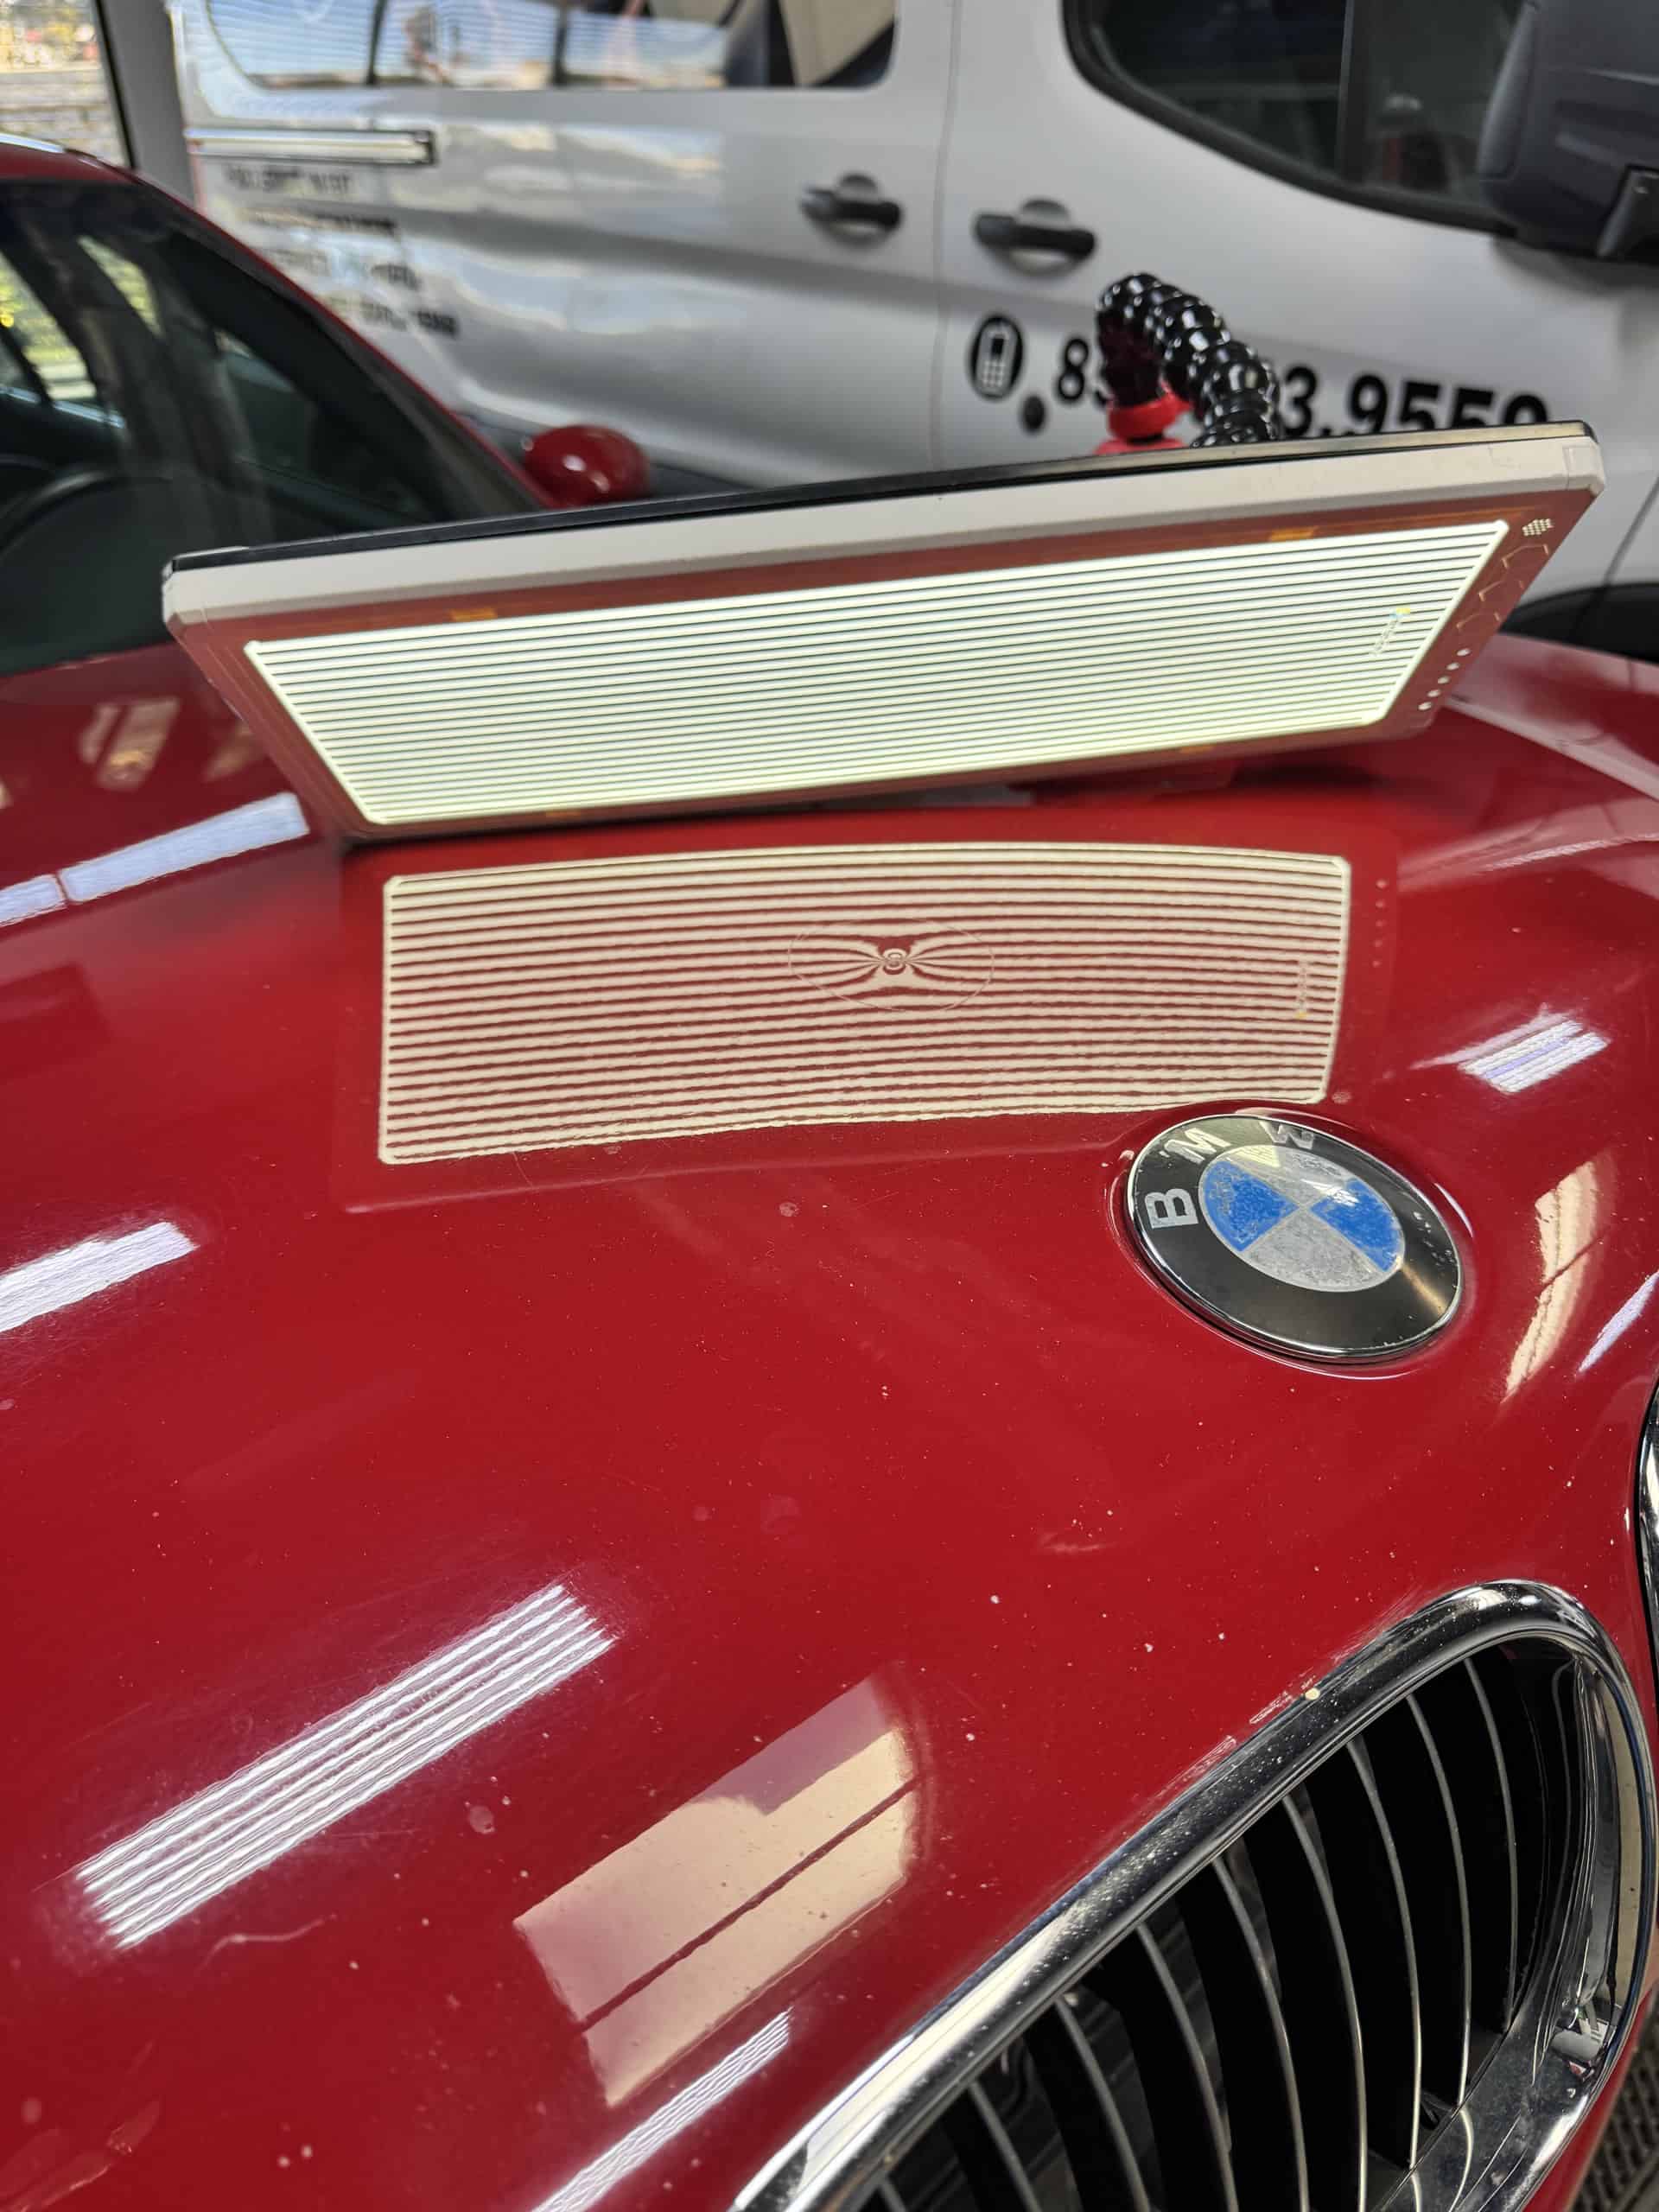
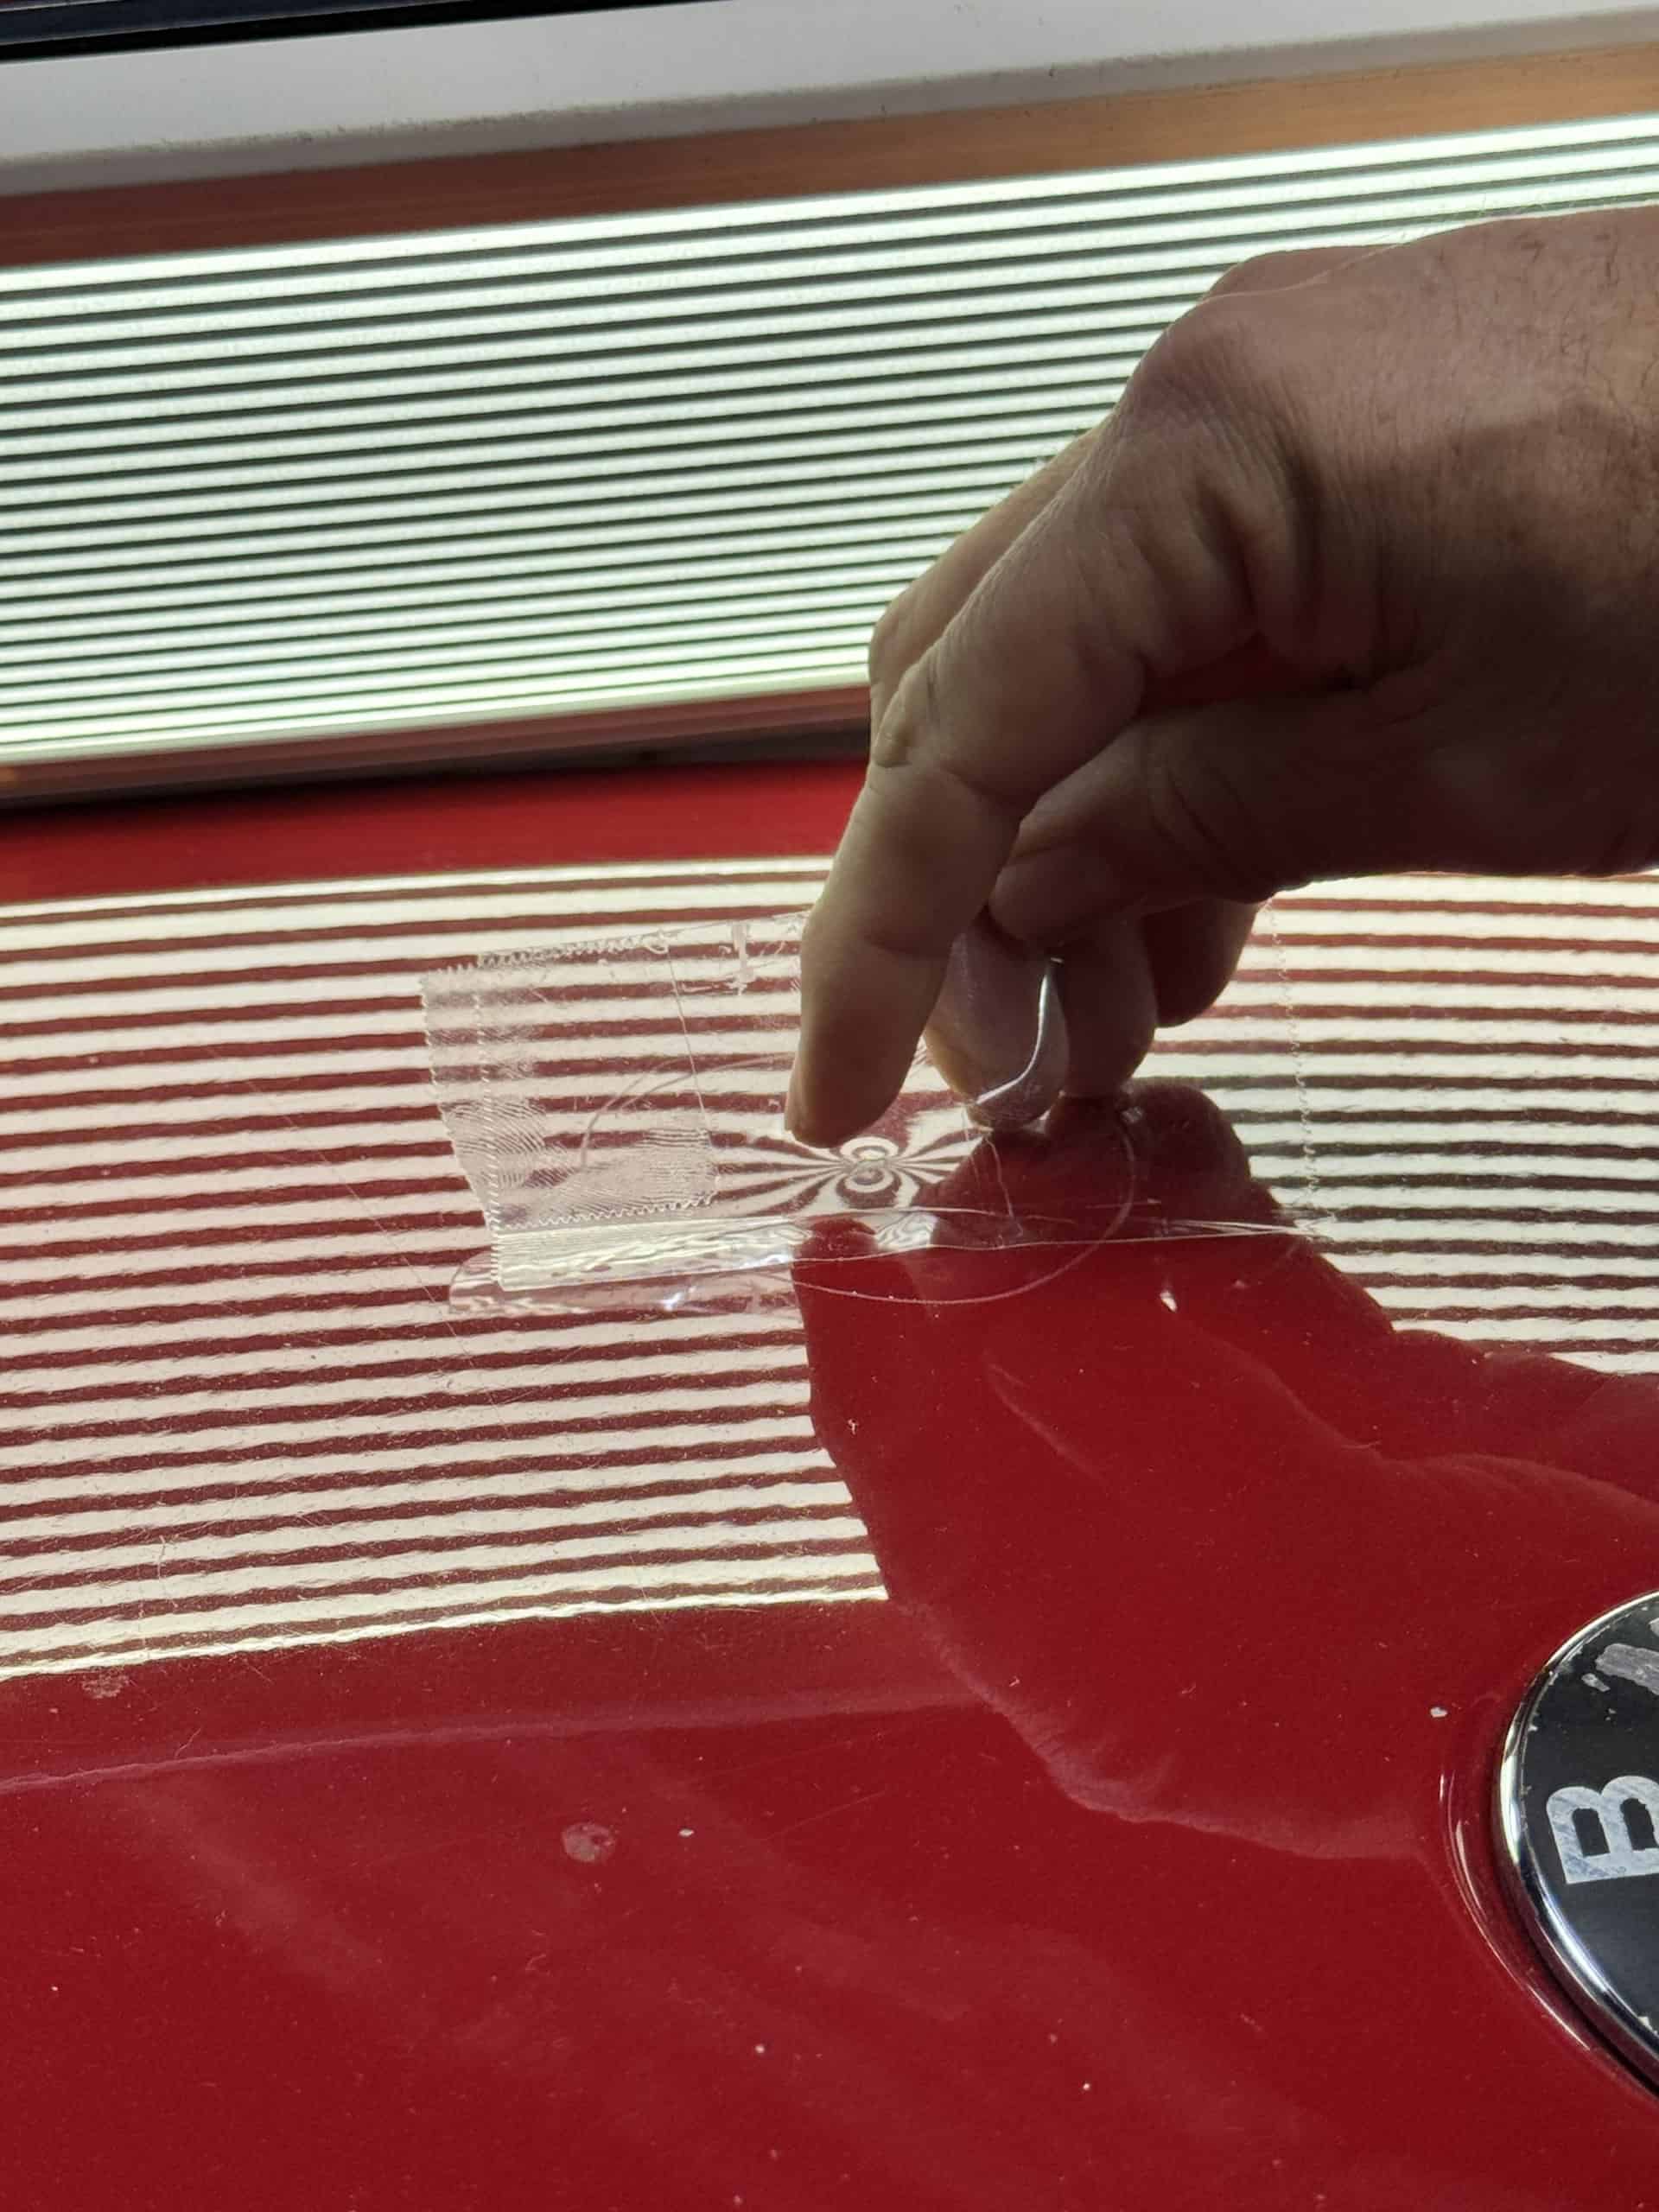
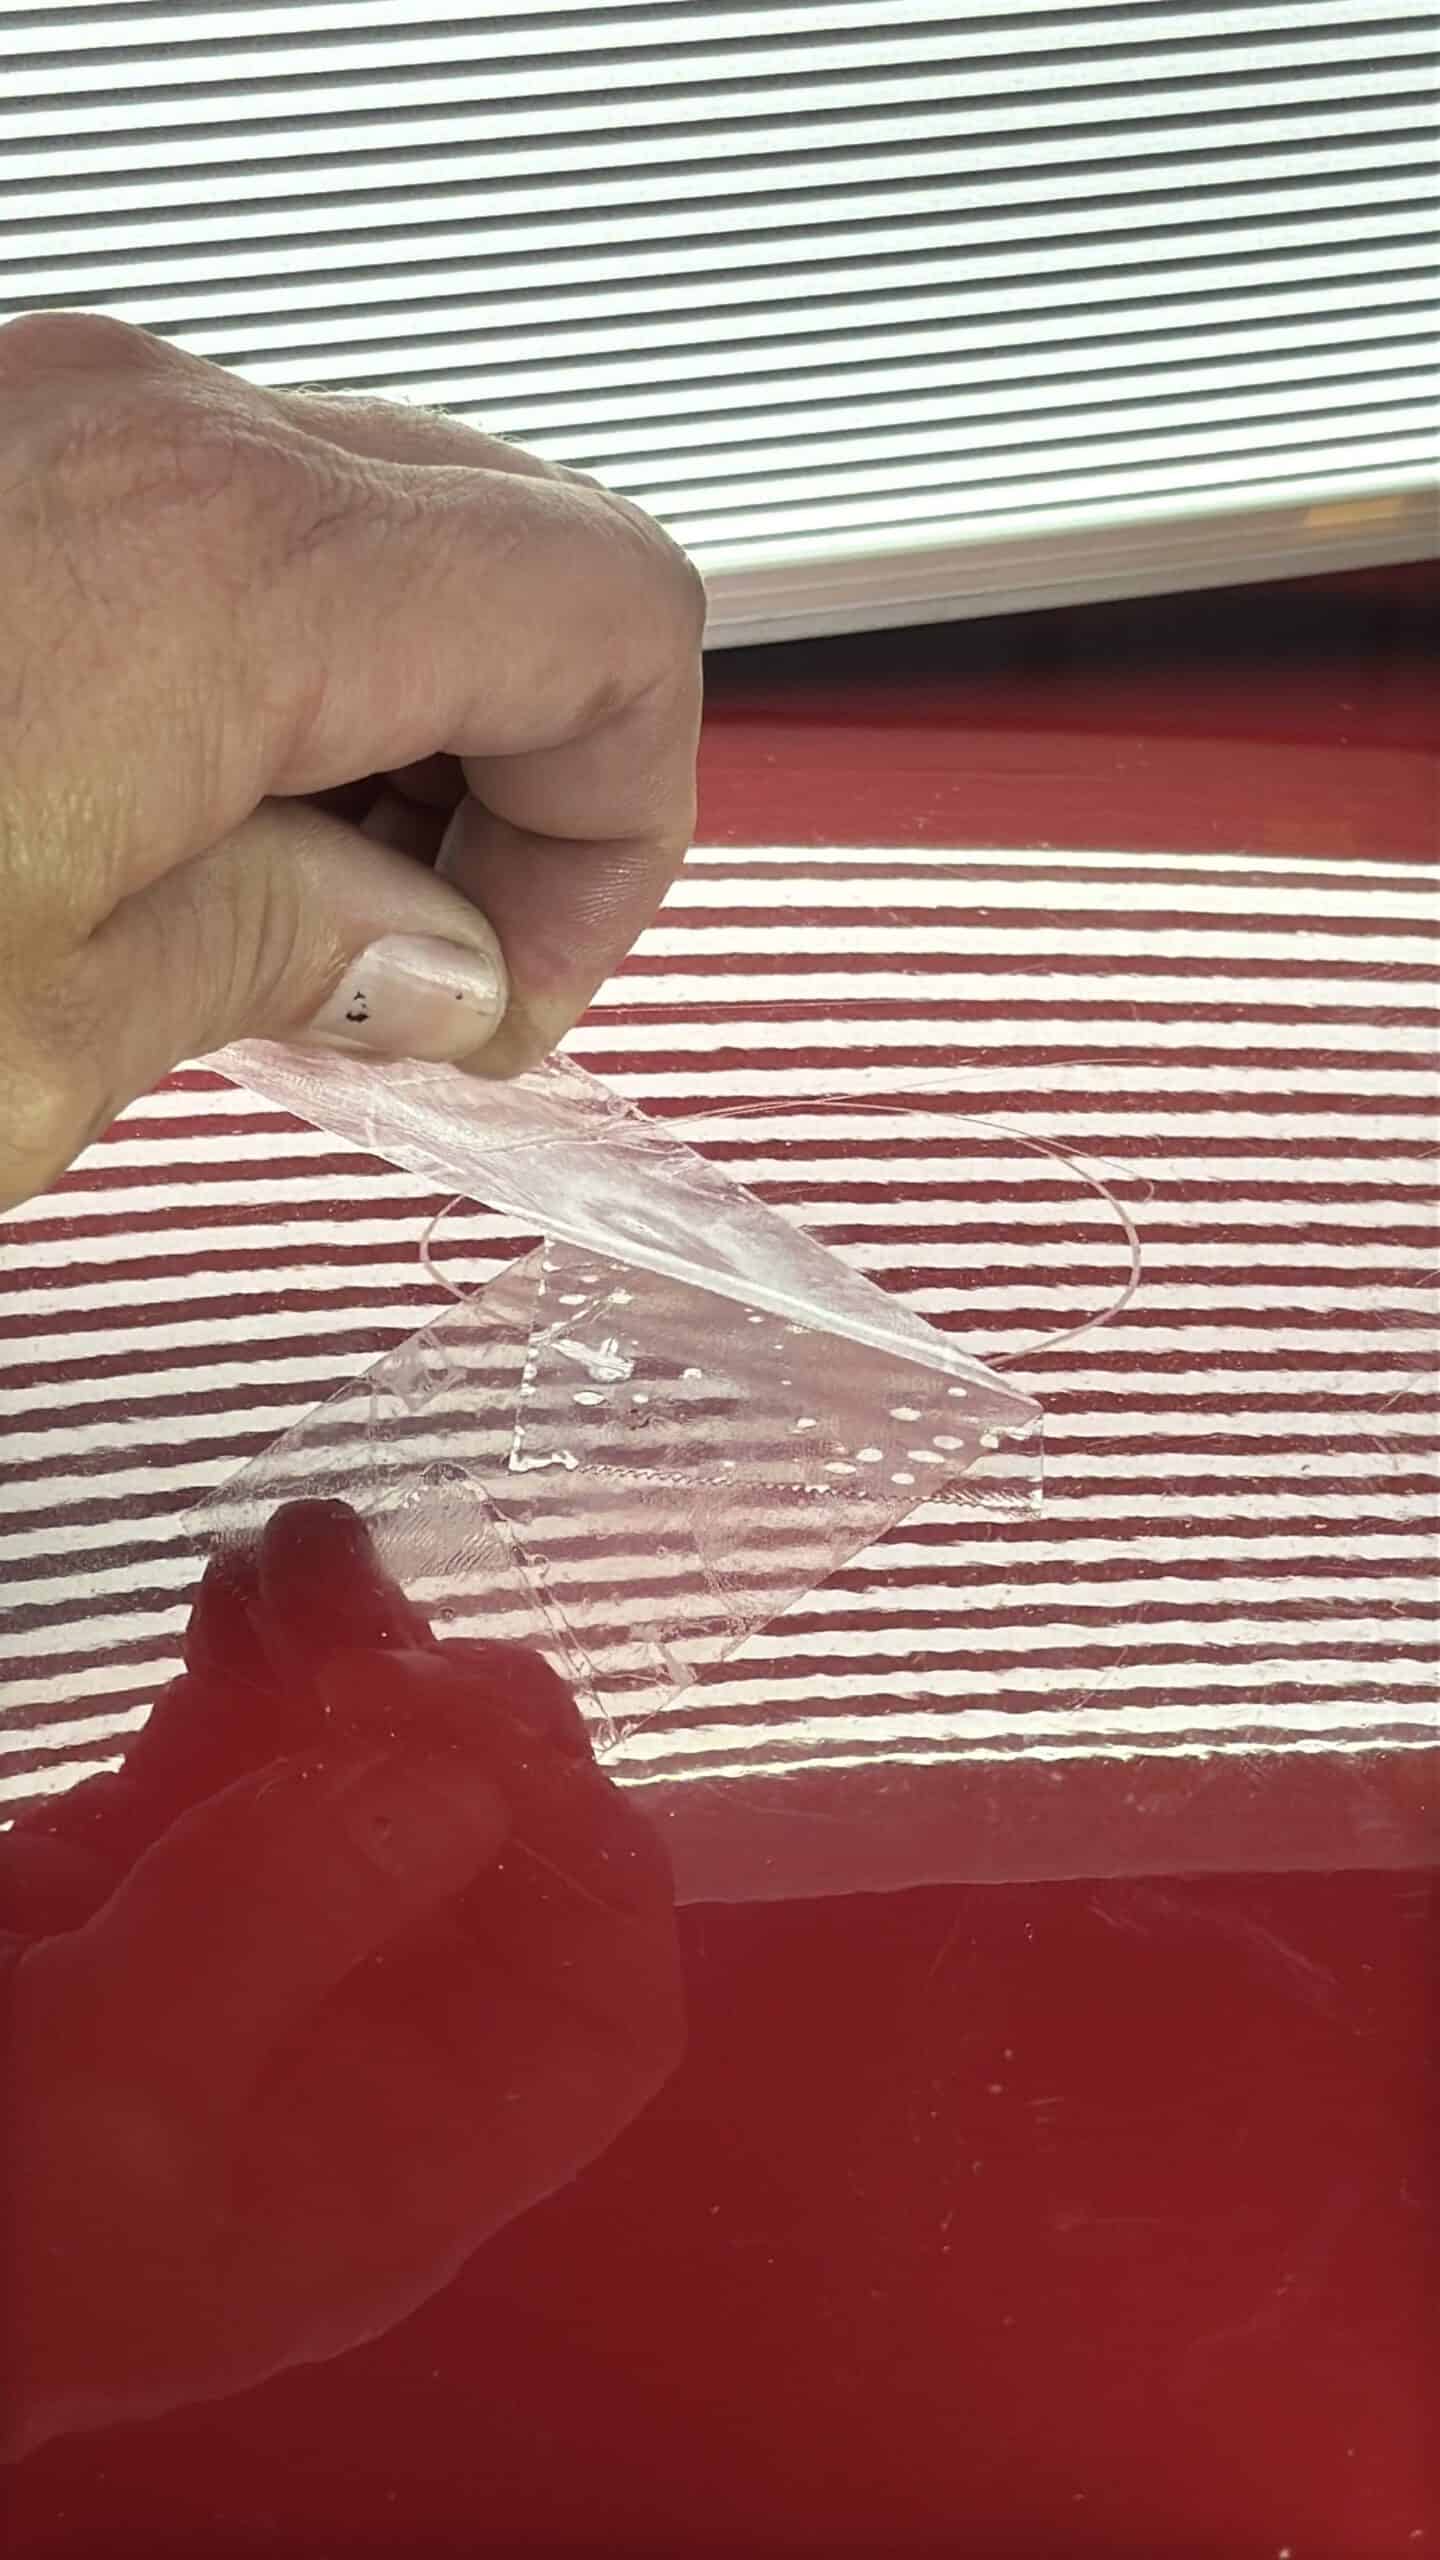
The Problem: With paint missing in the center of the high spot, reading the damage was nearly impossible. The line board reflects off paint — no paint, no reflection, no ability to see what you’re doing.
The Solution: Clear packing tape.
🔧 TECH NOTE — Why Clear Tape Works
Standard masking tape is too opaque. Duct tape destroys the remaining paint. Clear packing tape does two critical things:
- Recreates reflection: The glossy surface gives your line board something to read
- Holds paint in place: Prevents existing cracks from spreading during aggressive tapping
Pro tip: Use high-quality tape with strong adhesive. Cheap tape peels under vibration, creating false readings mid-repair. Apply it smoothly — wrinkles create false reflections that will confuse your read.
Initial damage assessment — severe upward impact crushed the metal
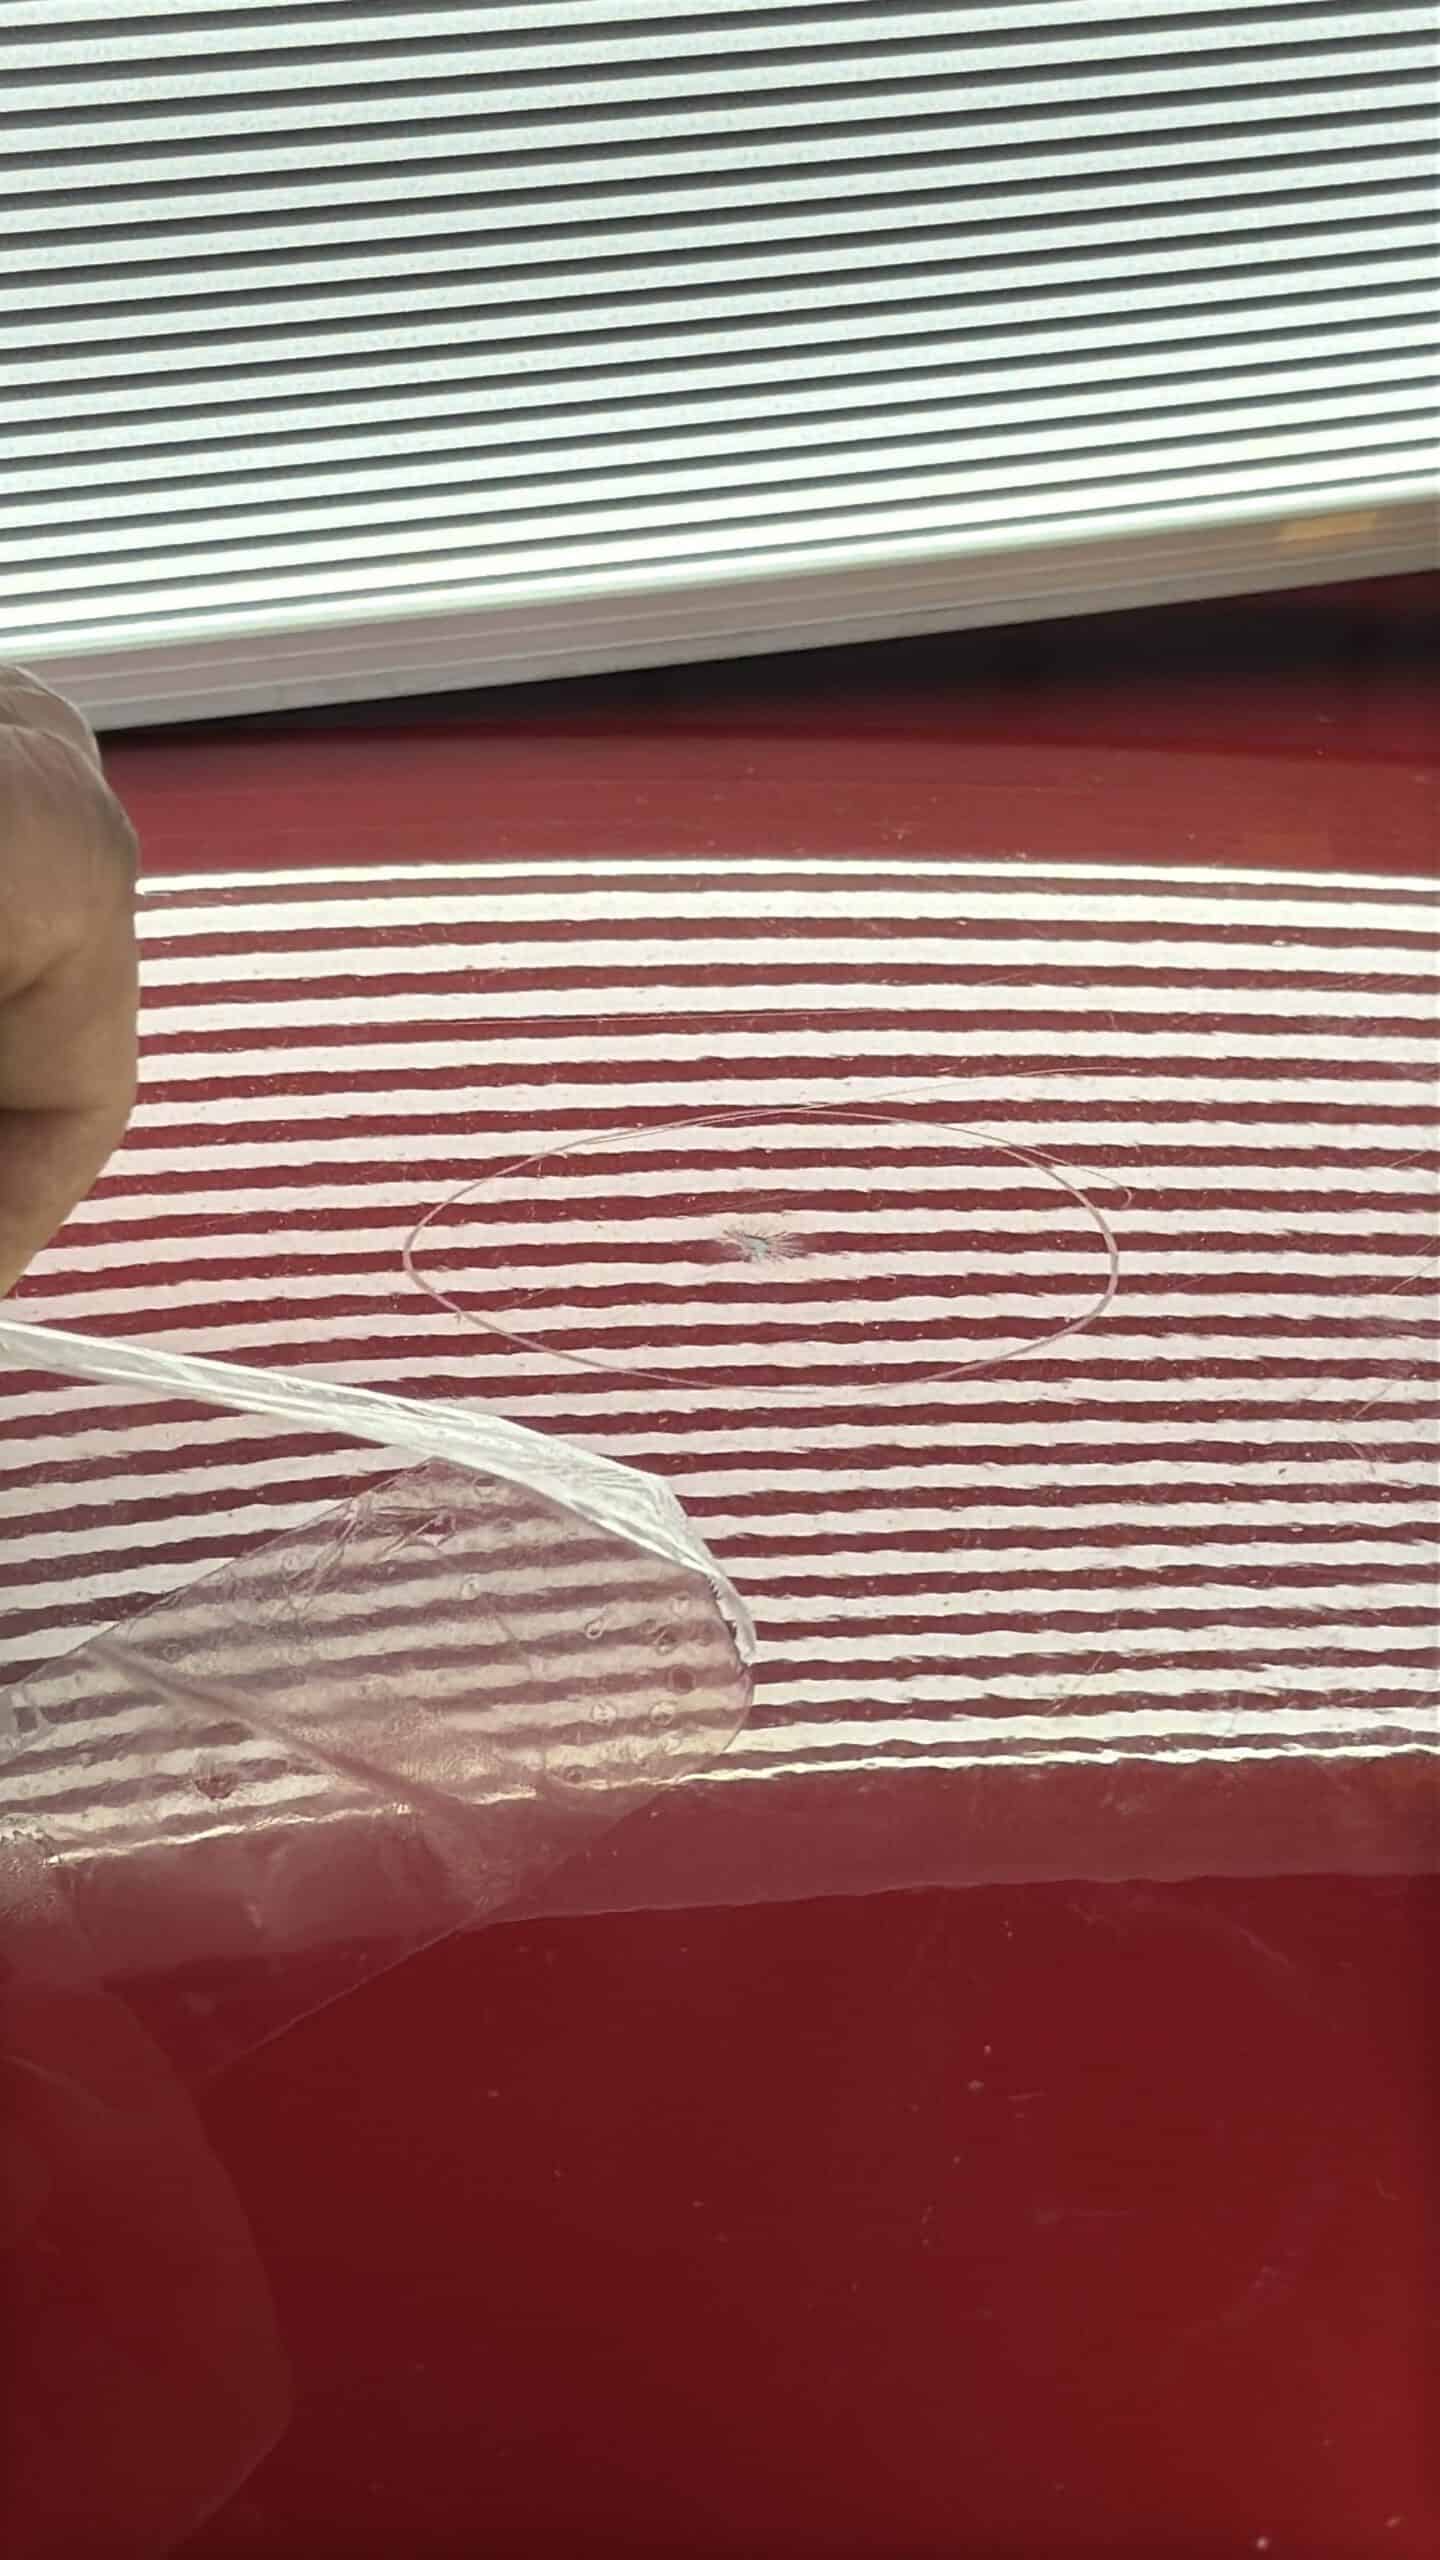
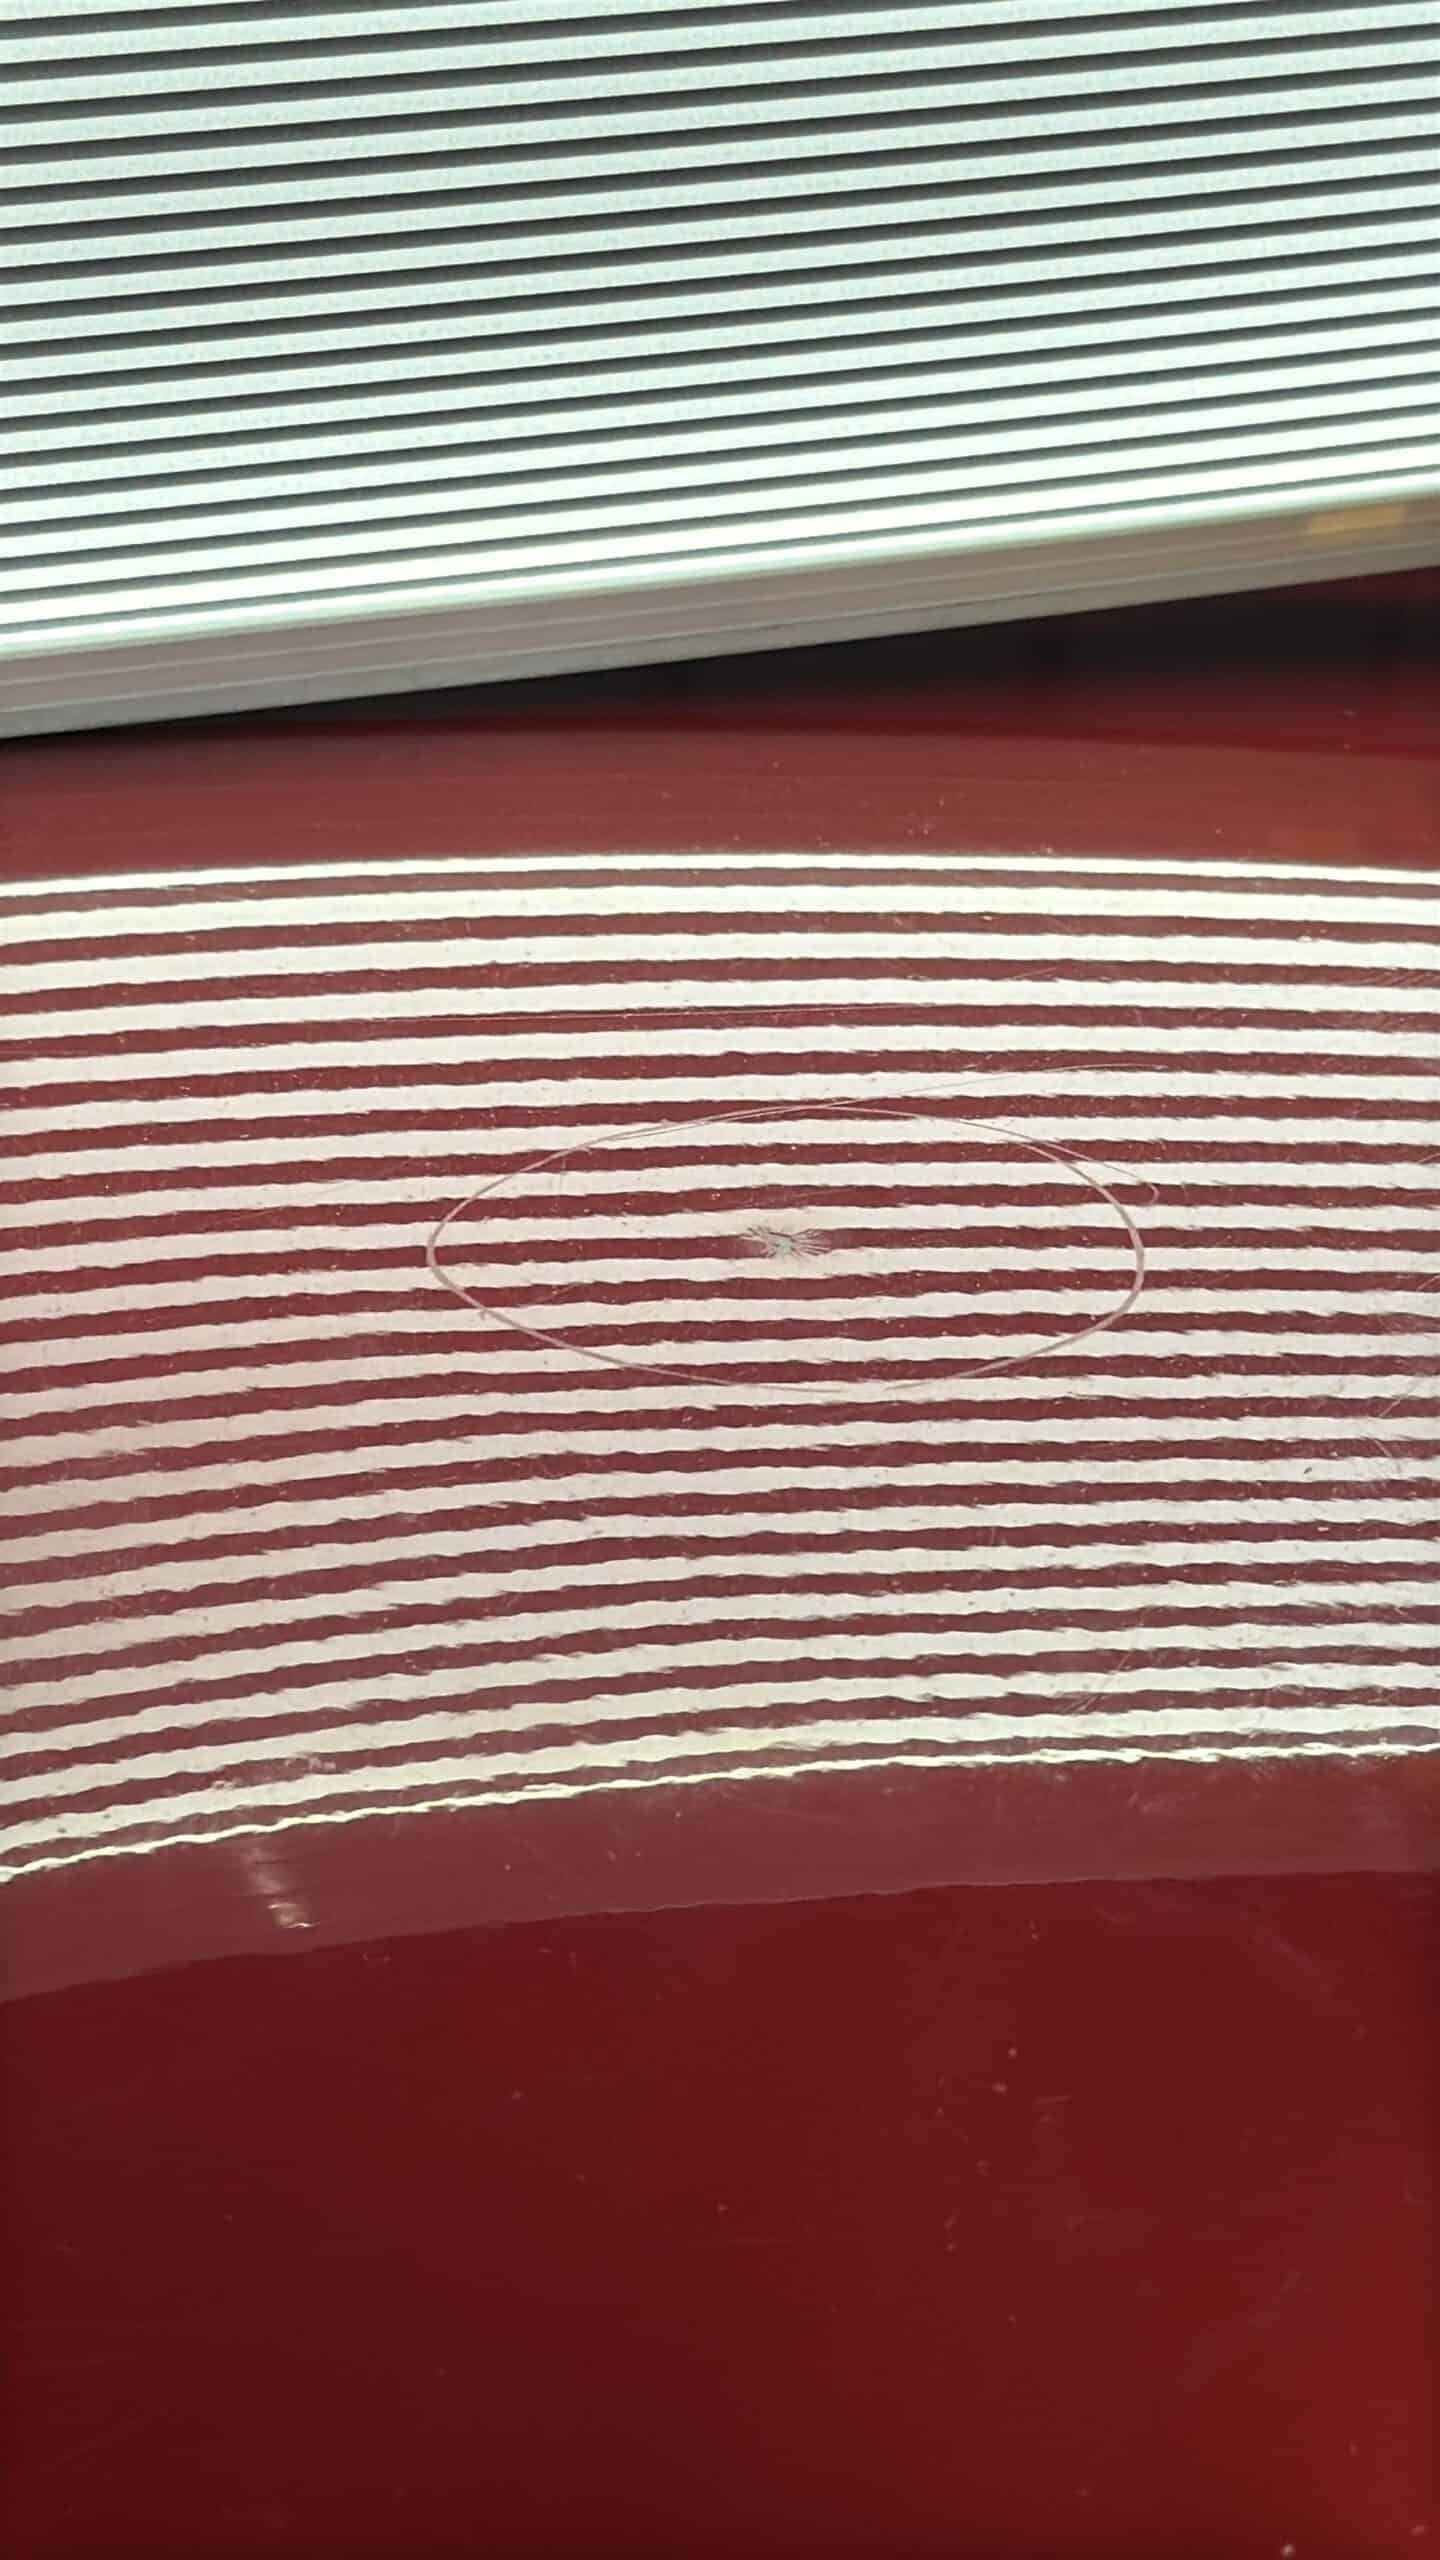
Clear packing tape creates a reflective surface where paint is missing
Tape applied smoothly — this becomes the new “reading surface”
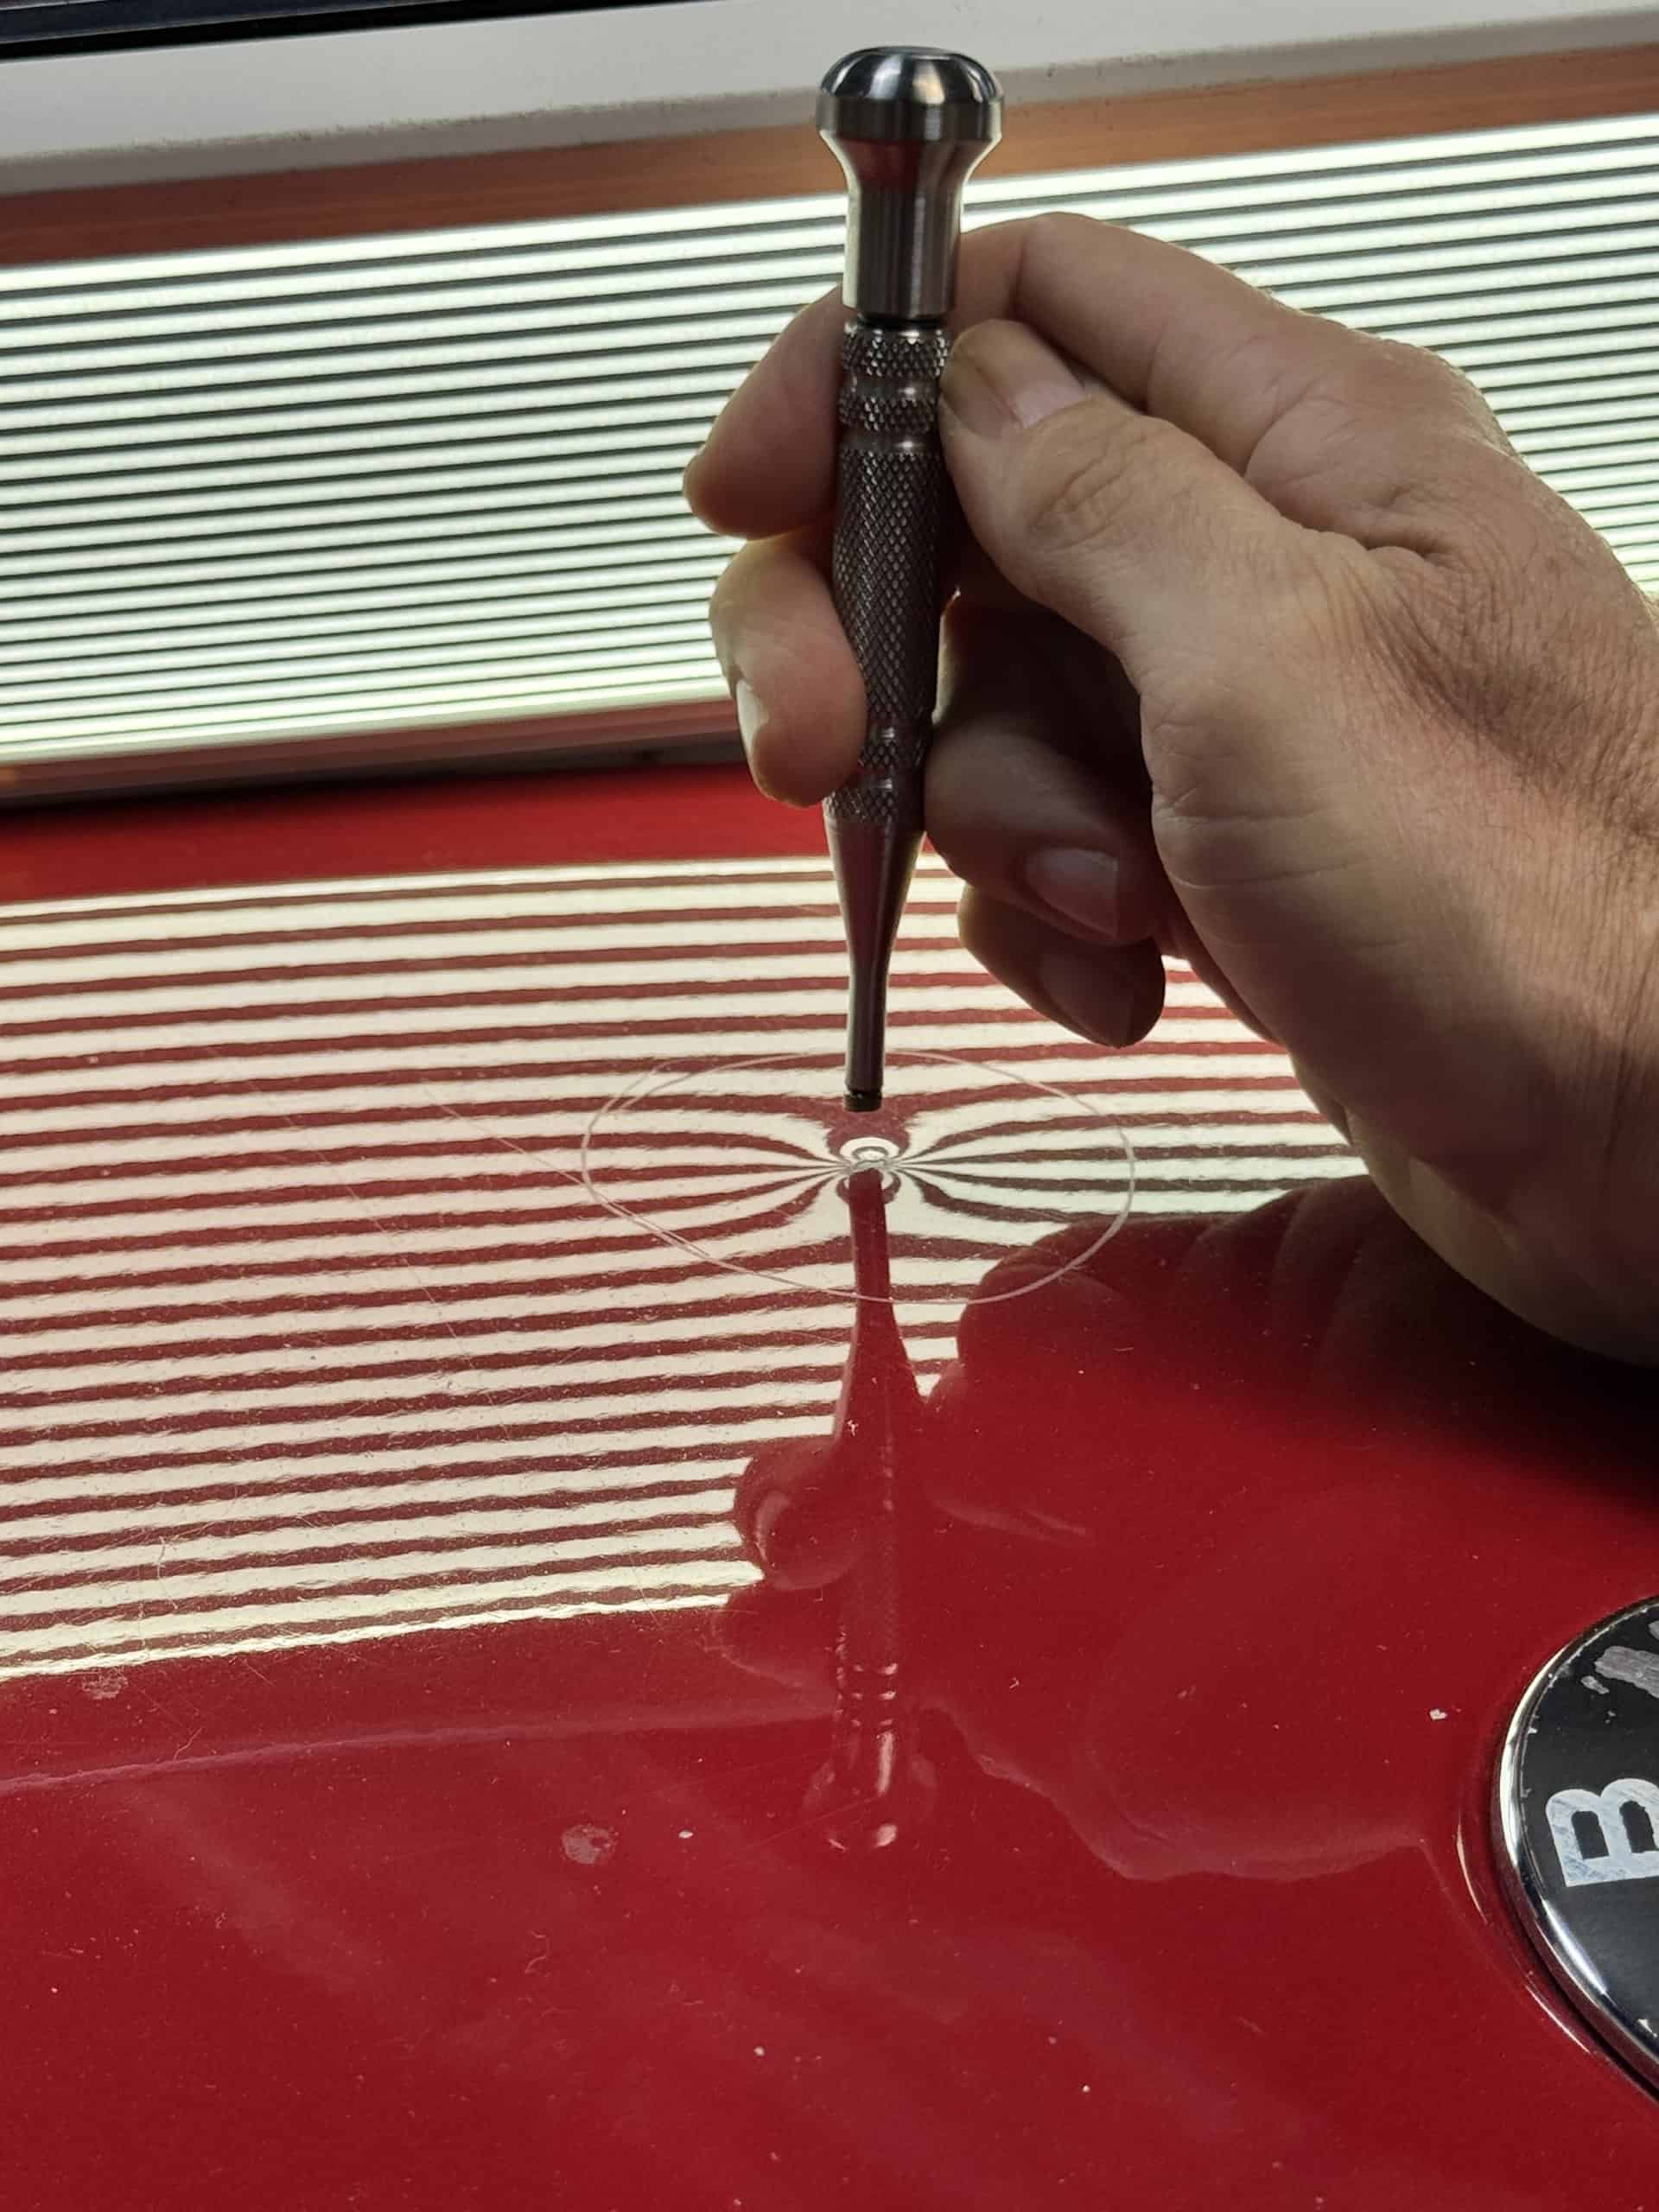
Step 2: The Knockdown — Resetting Crushed Metal
The Problem: This high spot wasn’t just pushed up — it was crushed to its absolute limit from underneath. Standard plastic knockdown tips would shatter against this kind of force. Metal-on-metal would destroy the tape and remaining paint.
The Solution: A leather-tipped metal knockdown.
🔧 TECH NOTE — Tool Selection Rationale
Why leather? The leather acts as a shock absorber. It buffers the impact, protecting the tape and remaining paint while still allowing serious force to transfer to the metal.
Why metal instead of plastic? Plastic tips deform under heavy impact, absorbing energy that needs to go into the metal. For severely crushed high spots, you need the rigidity of metal with the protection of the leather buffer.
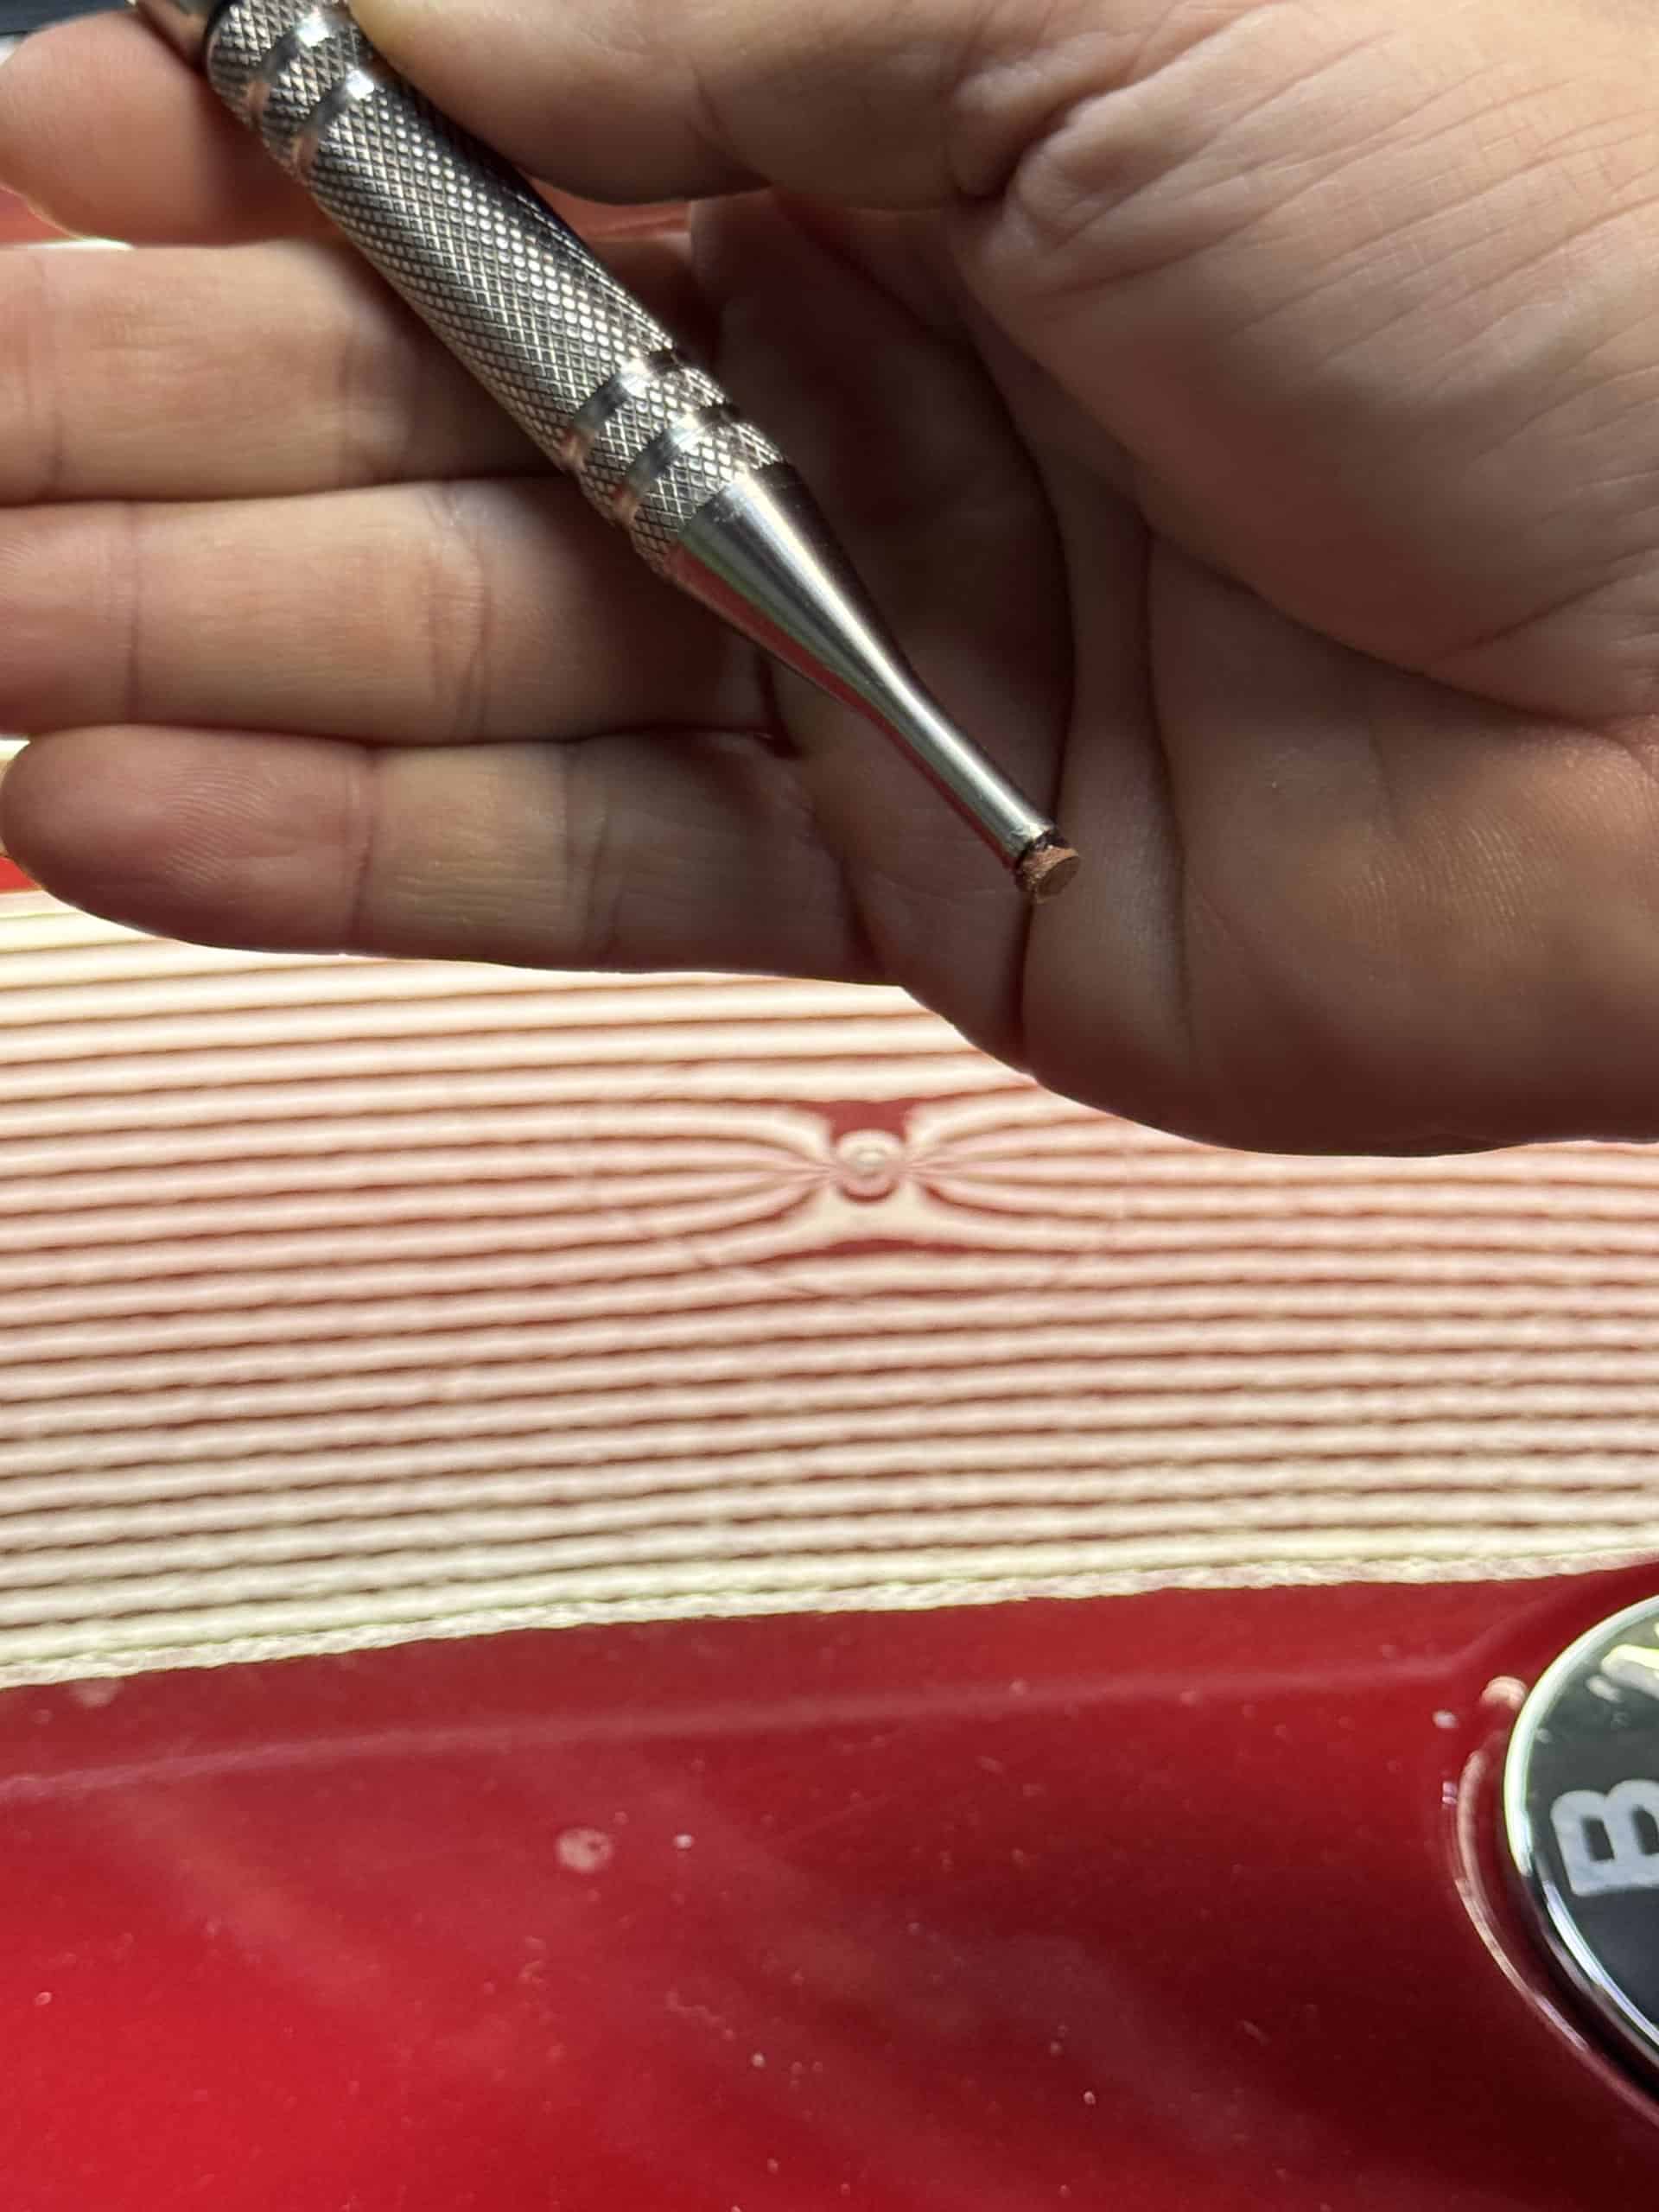
Construction: Glue a small piece of leather (3/4″ square, 1/8″ thick) to the tip of a standard metal tap-down. Contact cement works best.
“You have to tap it down further than flat,” Myke explains. “You’re reversing the damage. That high spot needs to become a low spot so you can bring it back up clean. It’s counterintuitive, but you have to make it worse before you can make it better.”
The leather-tipped knockdown — metal force with paint protection
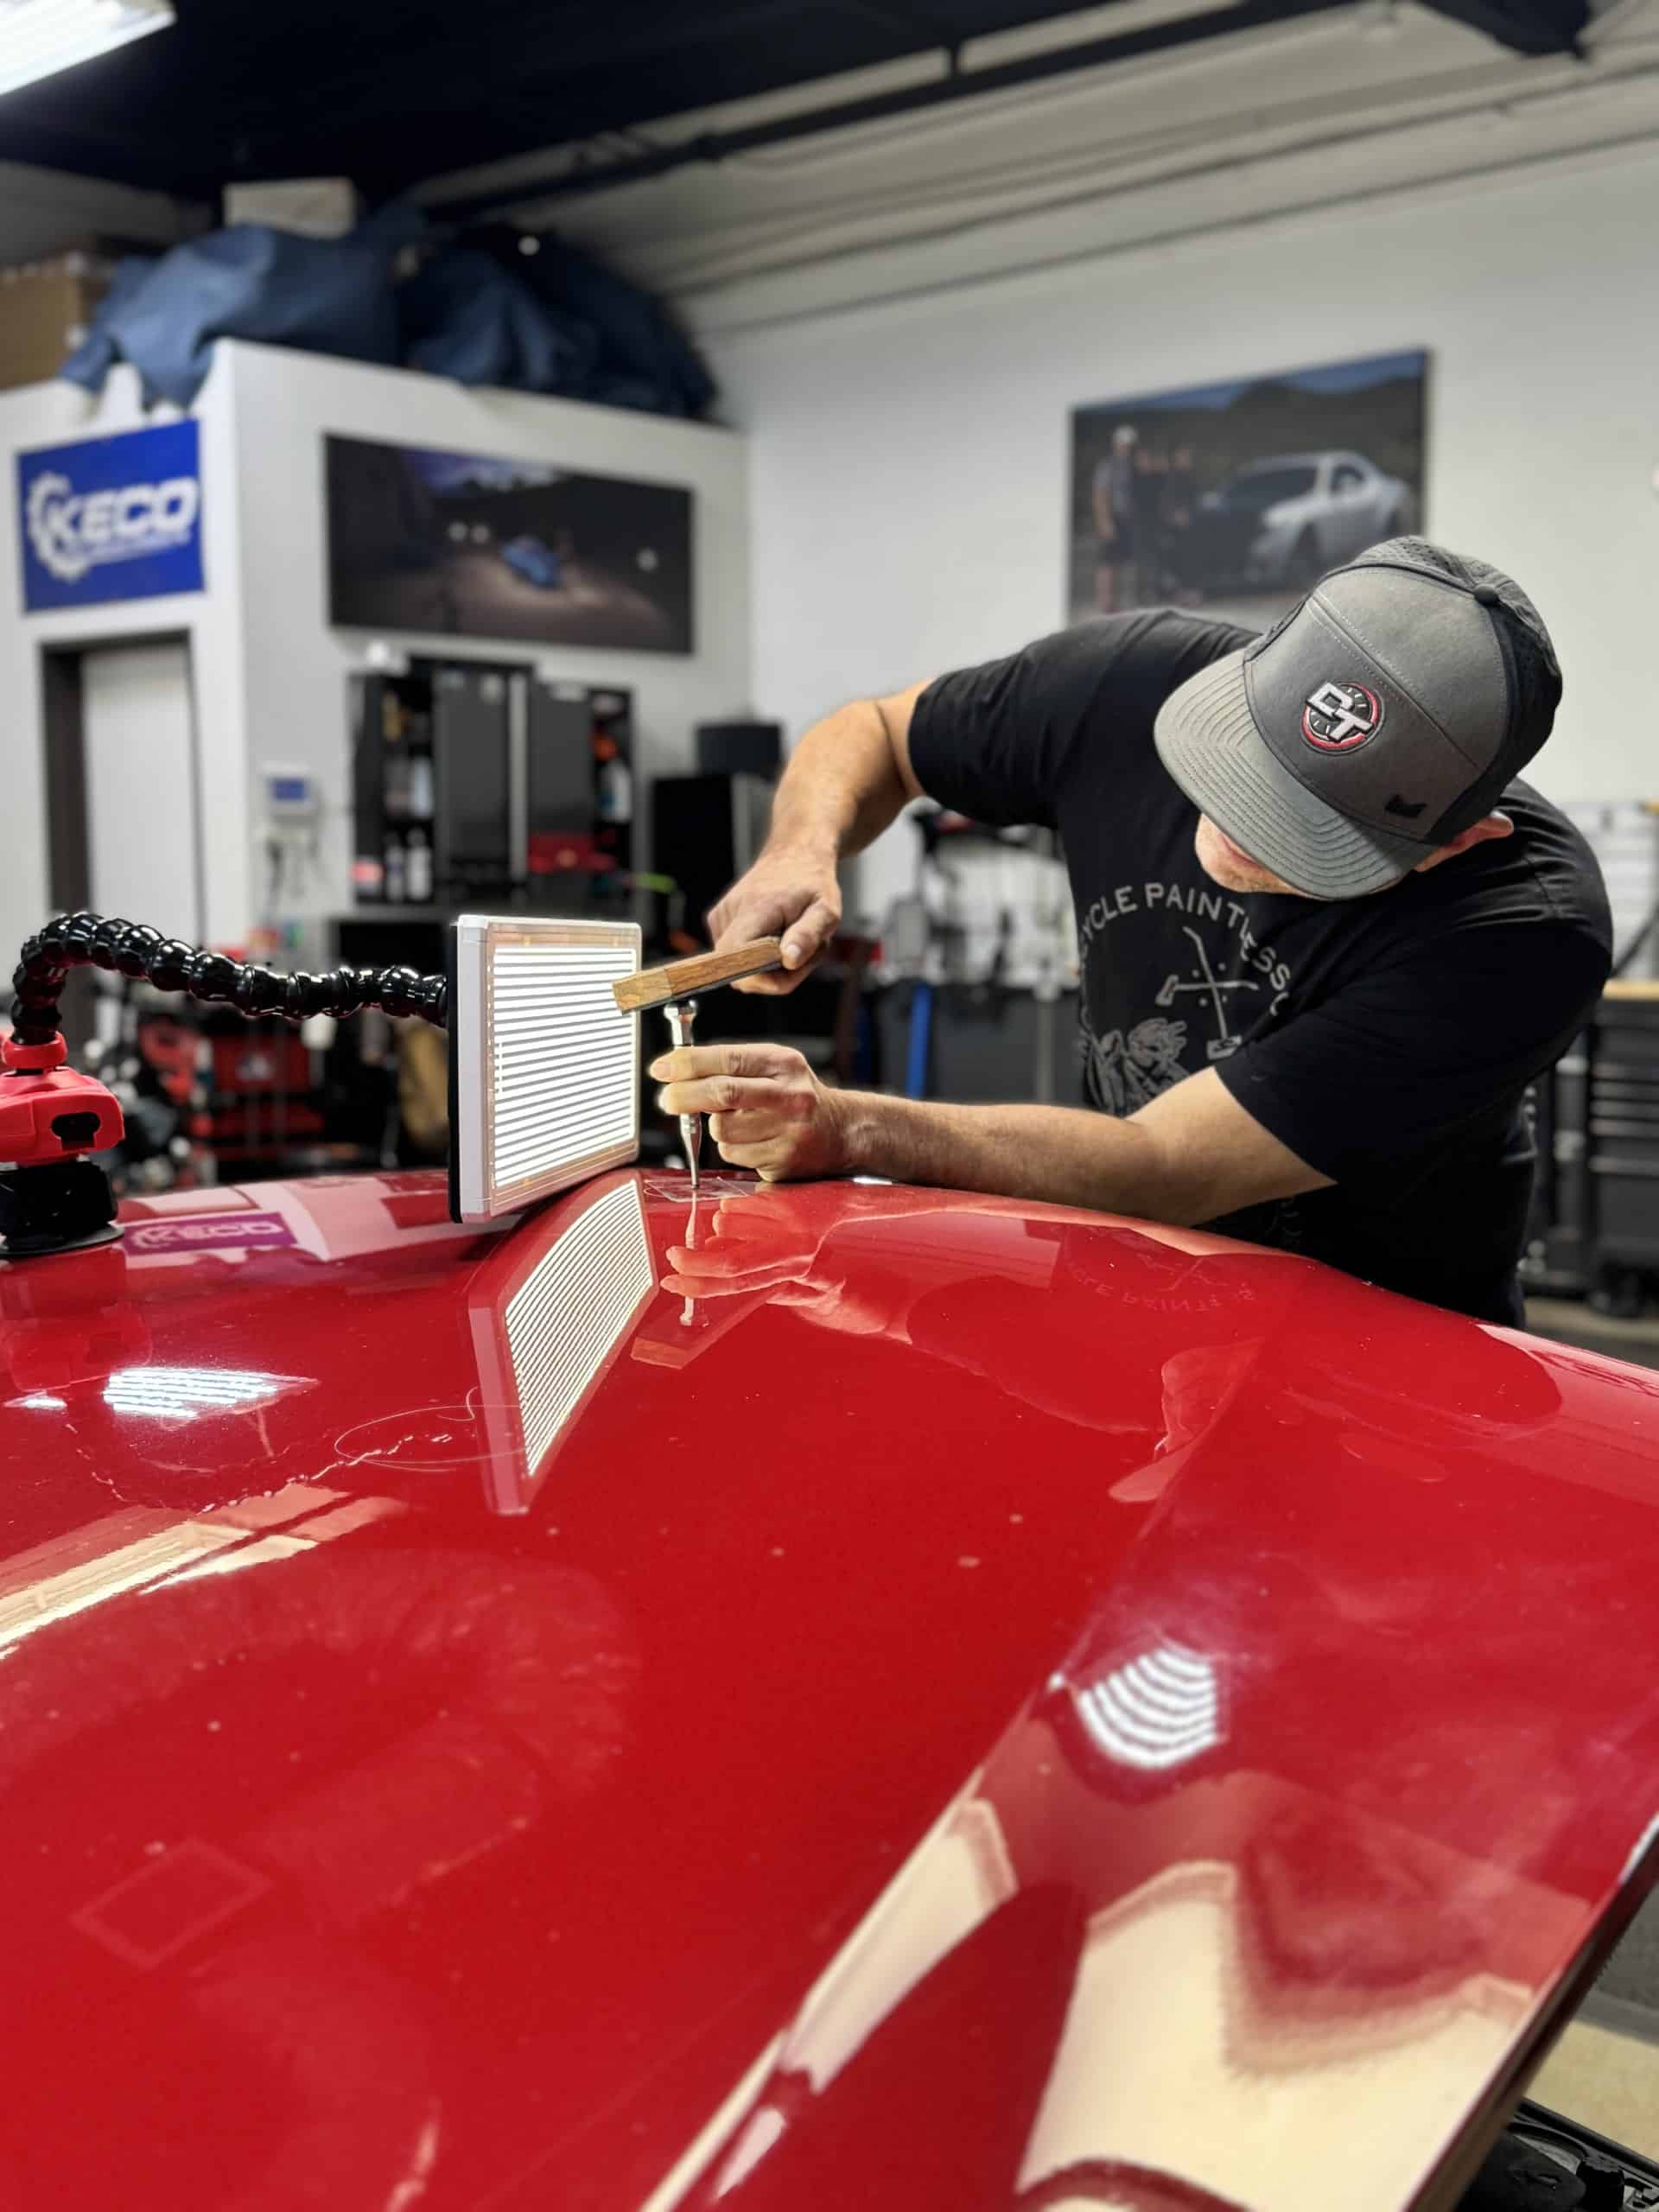
Aggressive tapping to reset the crushed high spot
Step 3: Reading the Progress
🔧 TECH NOTE — Reading High Spot Progress
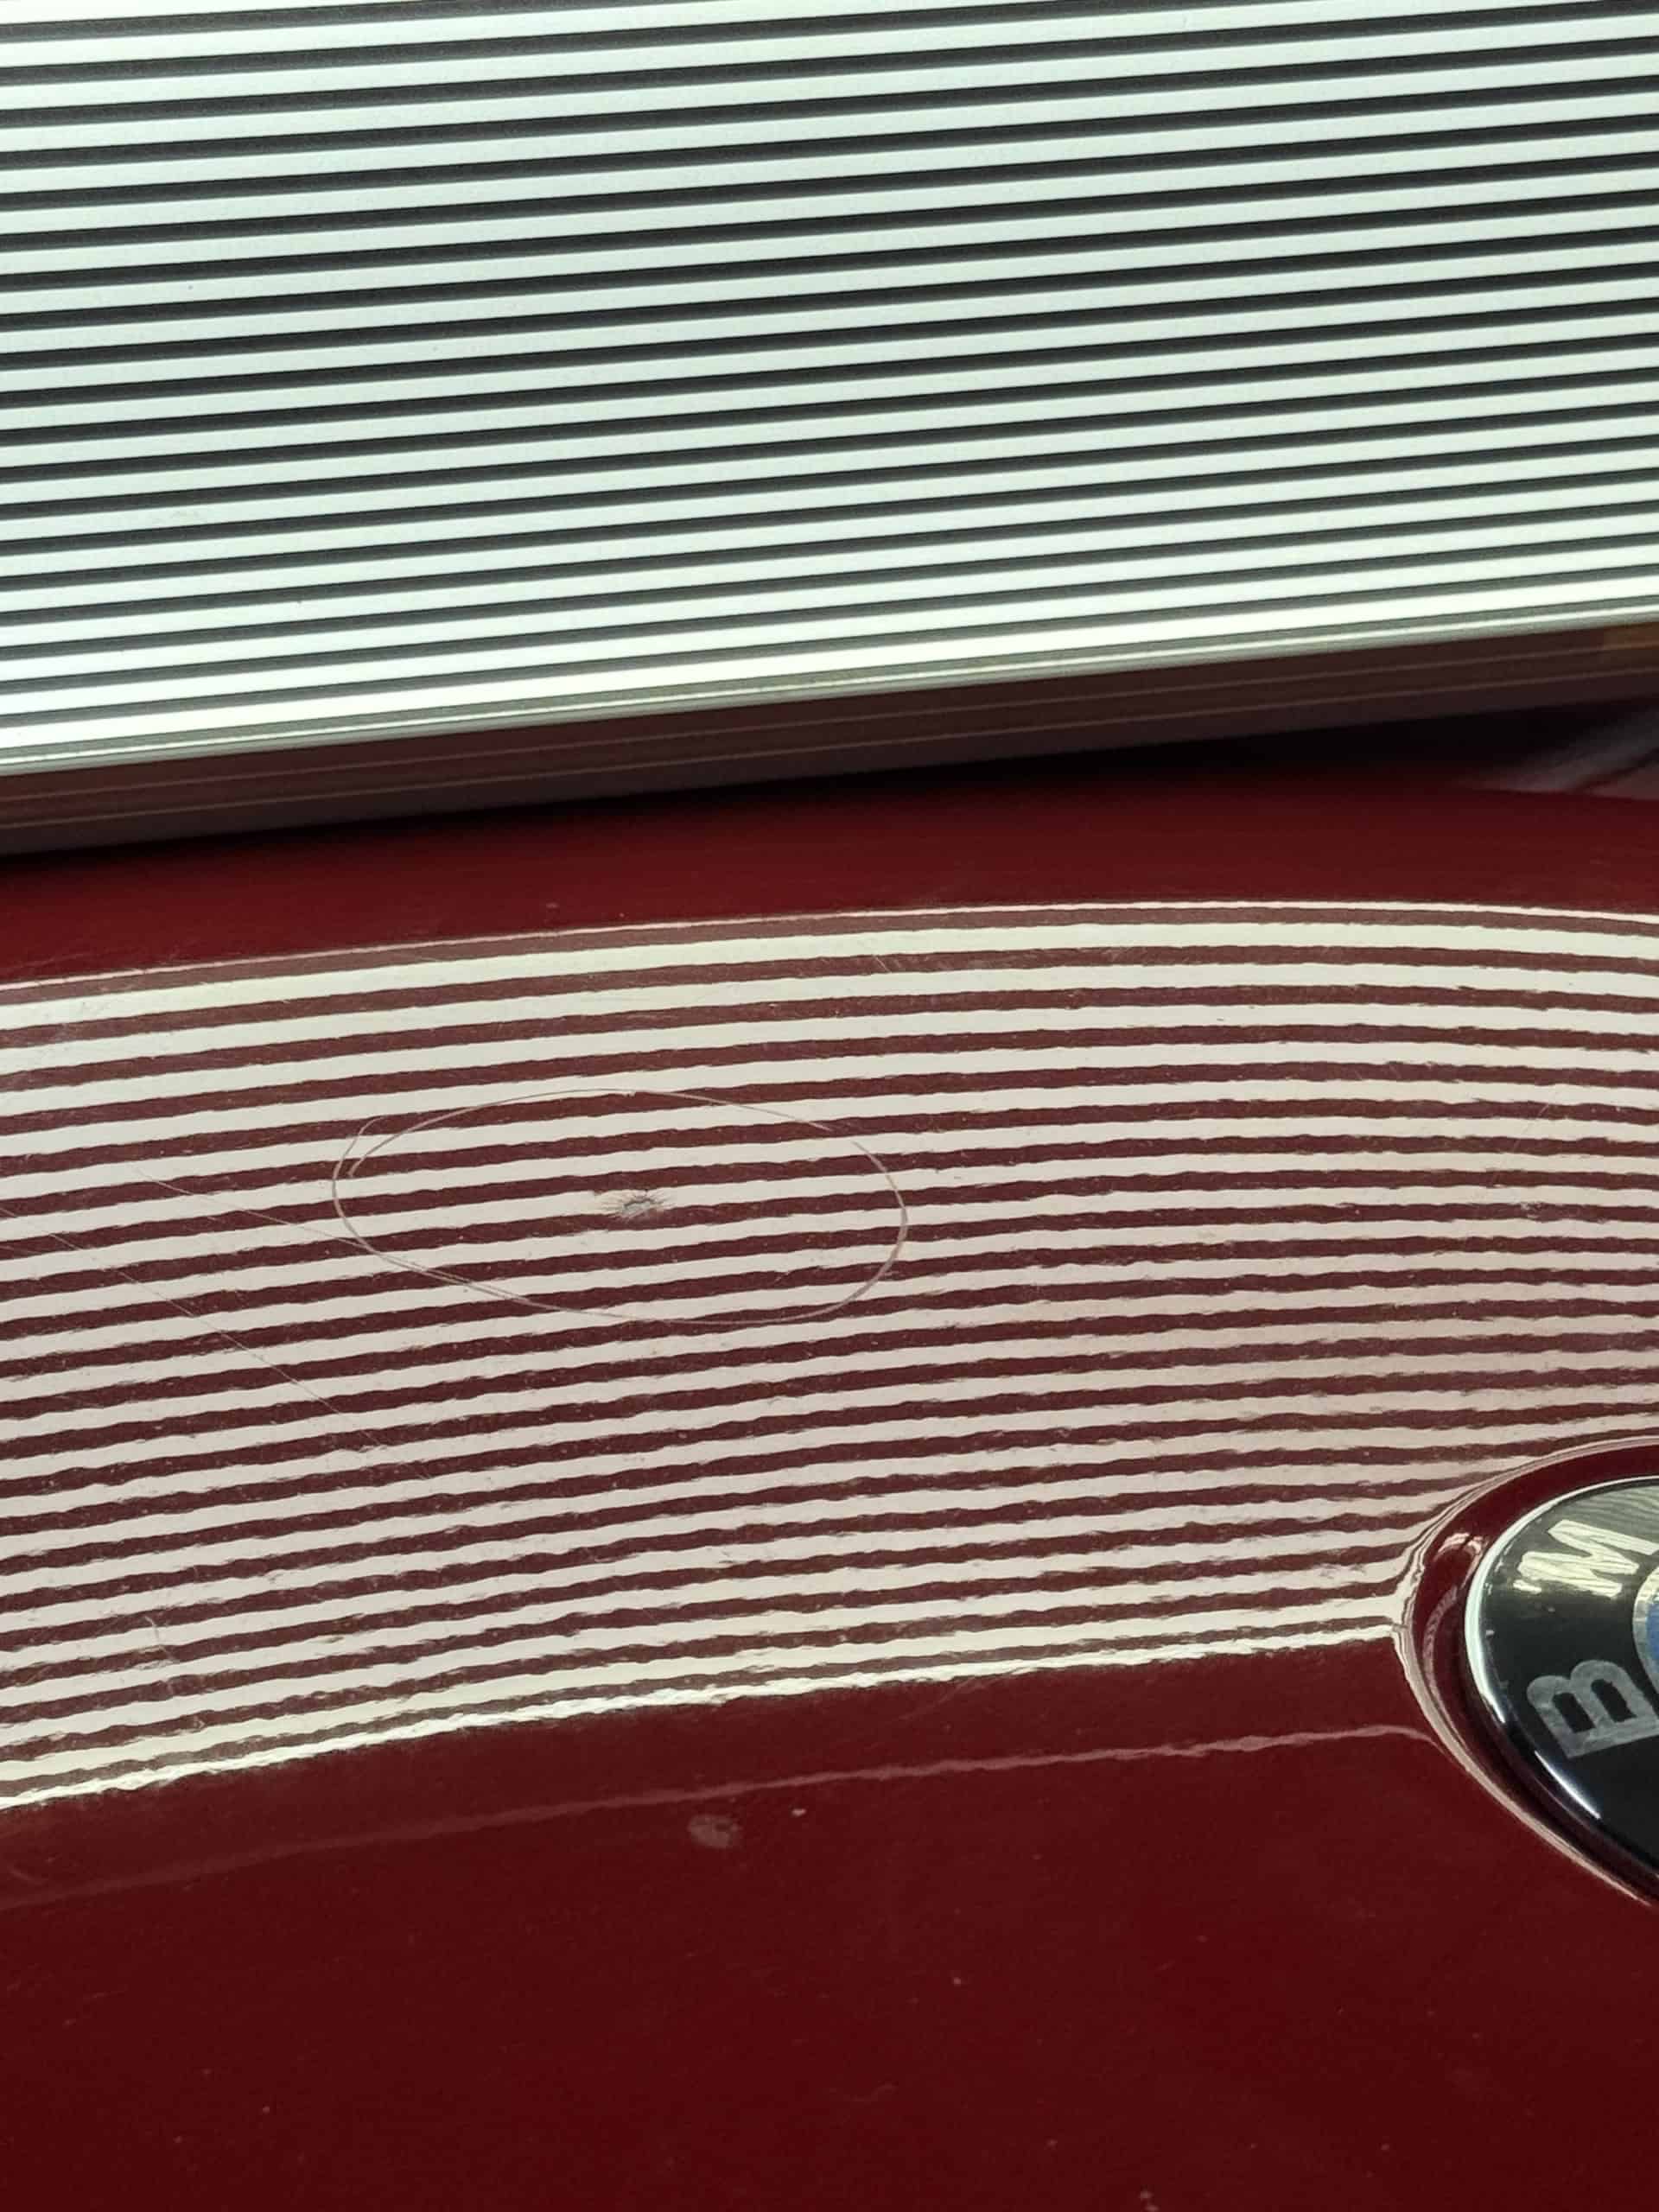
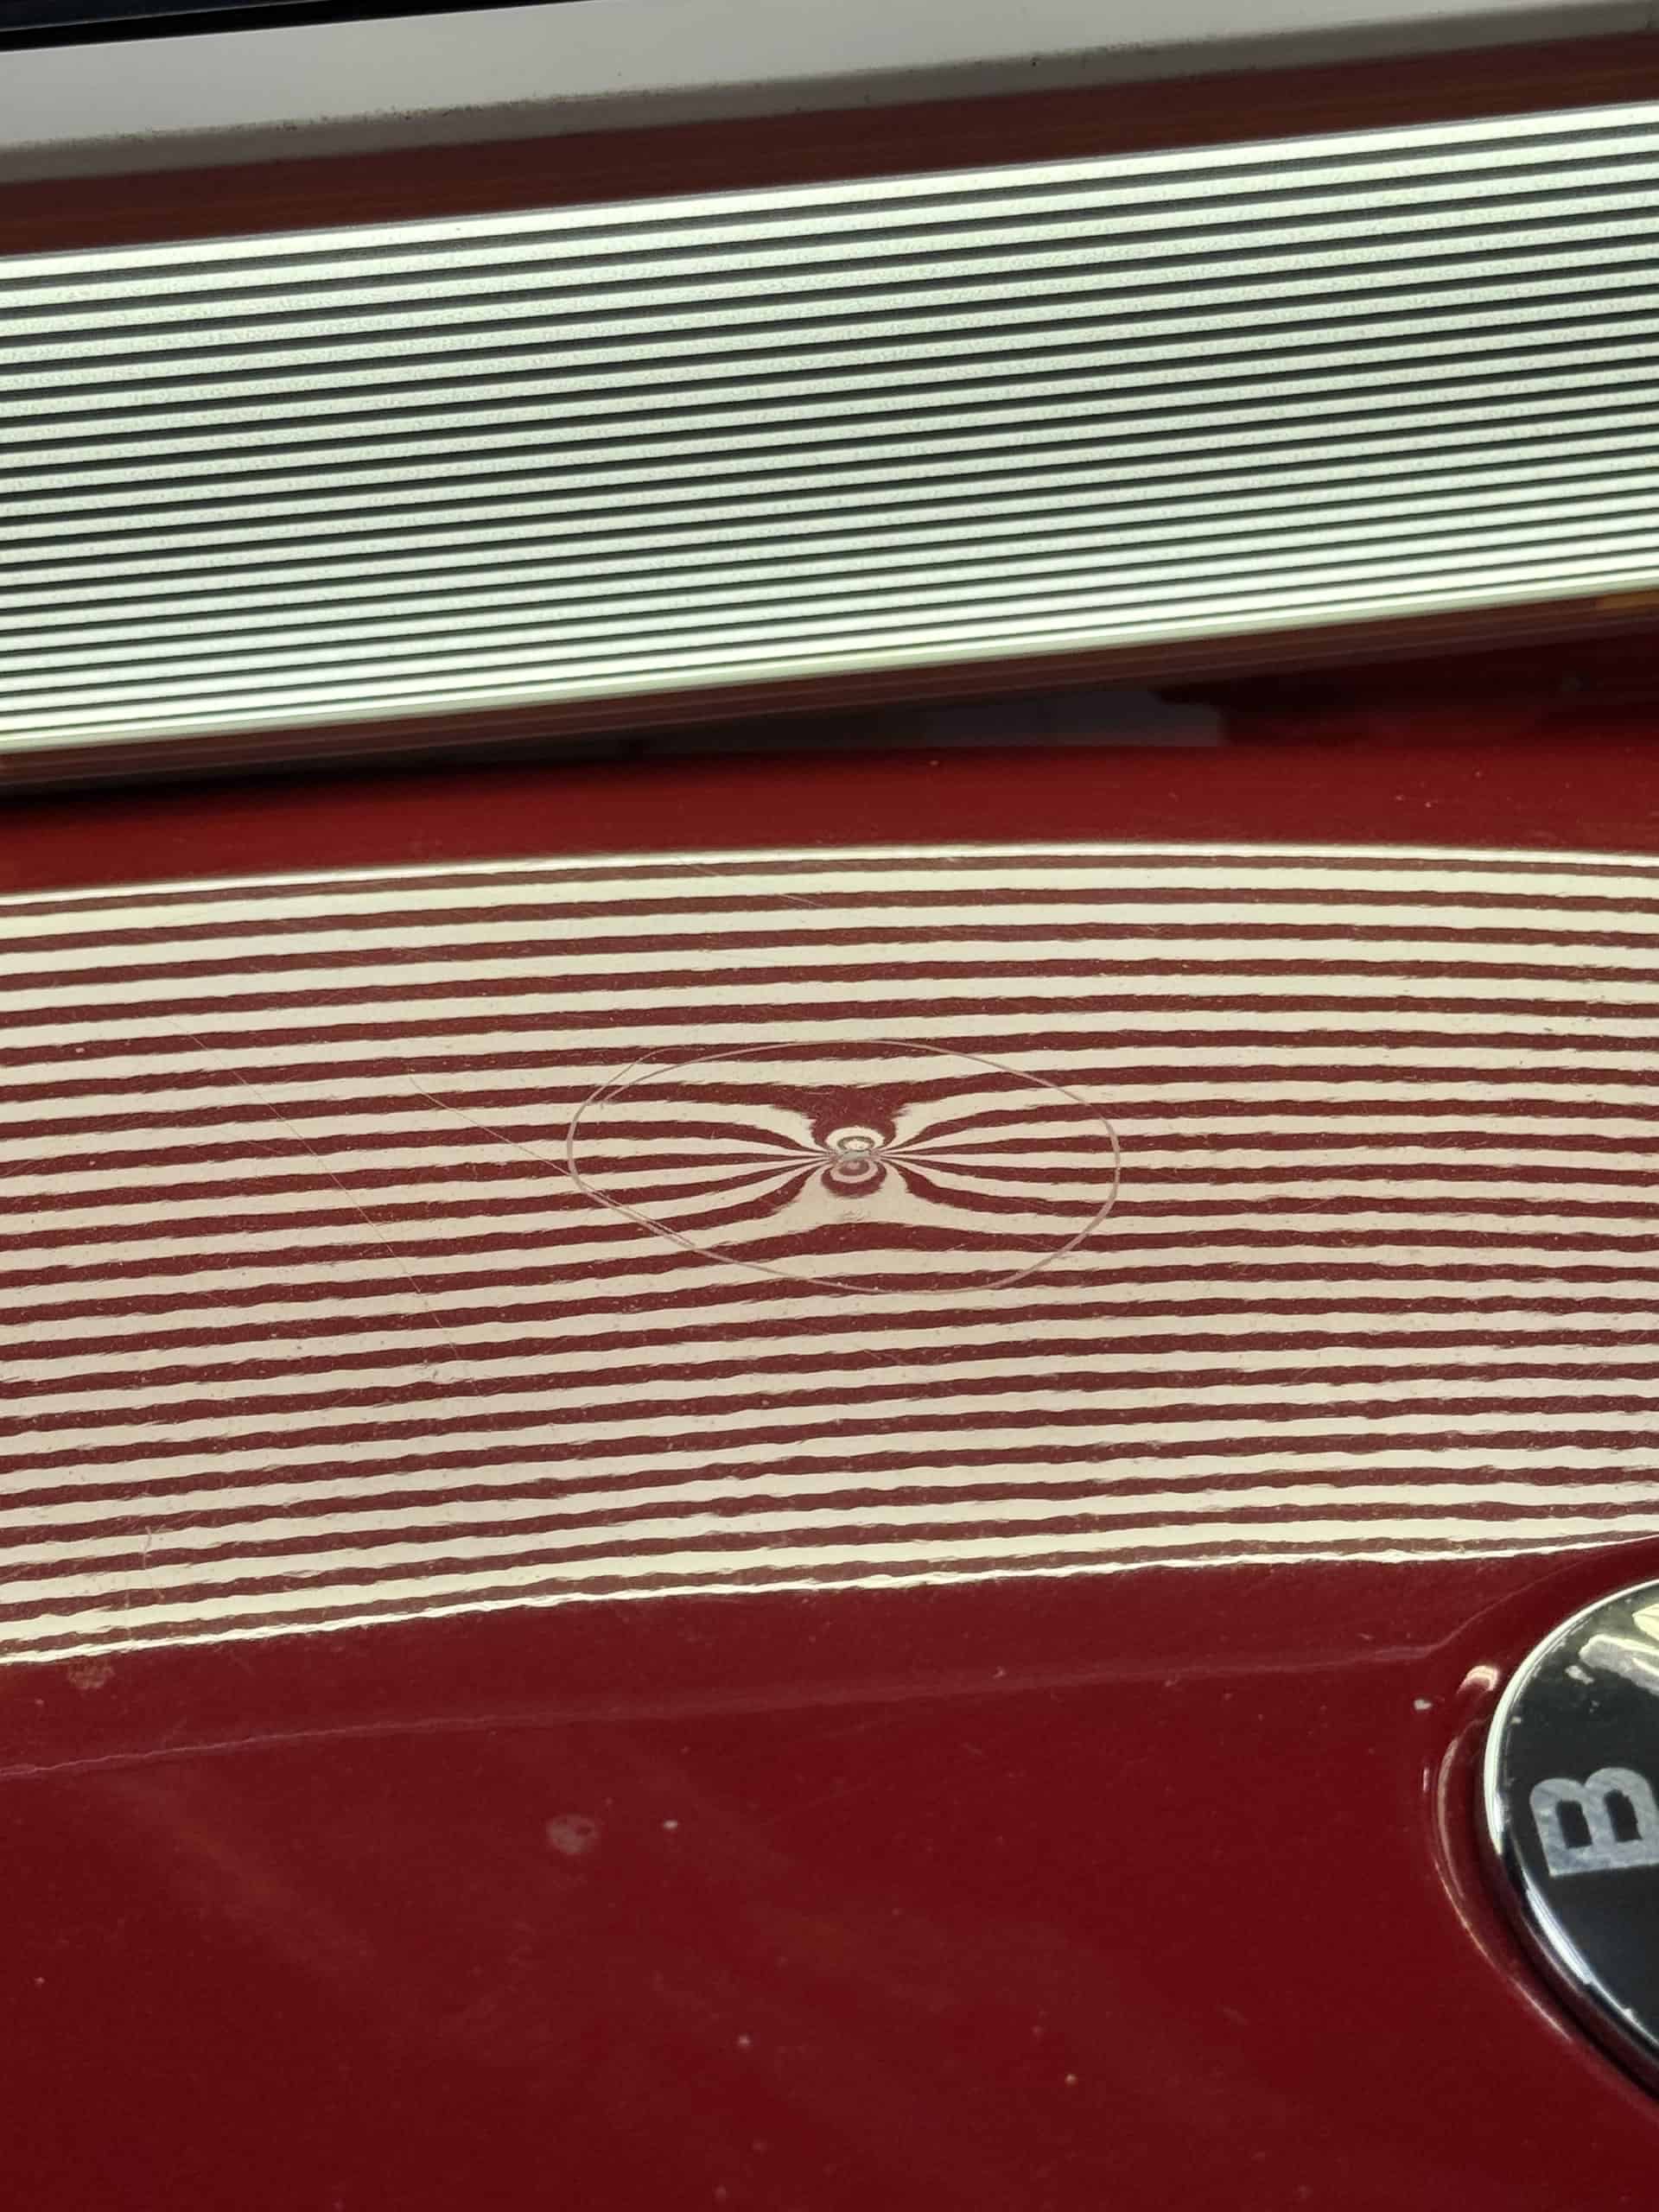
Sharp high spots show as: Tight, distorted line patterns. The lines bunch up and bend sharply around the peak.
As metal moves lower: The lines widen and relax. You’re looking for a “shallow pool” effect — wide, gentle curves instead of tight distortions.
The “shoulder” concept: Sharp edges around the damage are called “shoulders.” When shoulders disappear and the transition becomes smooth, you’re ready for the next phase.
Line width matters: For massive damage like this, use thicker lines. “Thinner lines show too much detail on big damage — they almost make you guess. Wider lines on bigger damage are easier to understand.”

Reading the reflection — sharp highs show as tight, distorted lines
Line board positioned to read the damage pattern from multiple angles
Cross-checking from every angle — symmetry is the goal
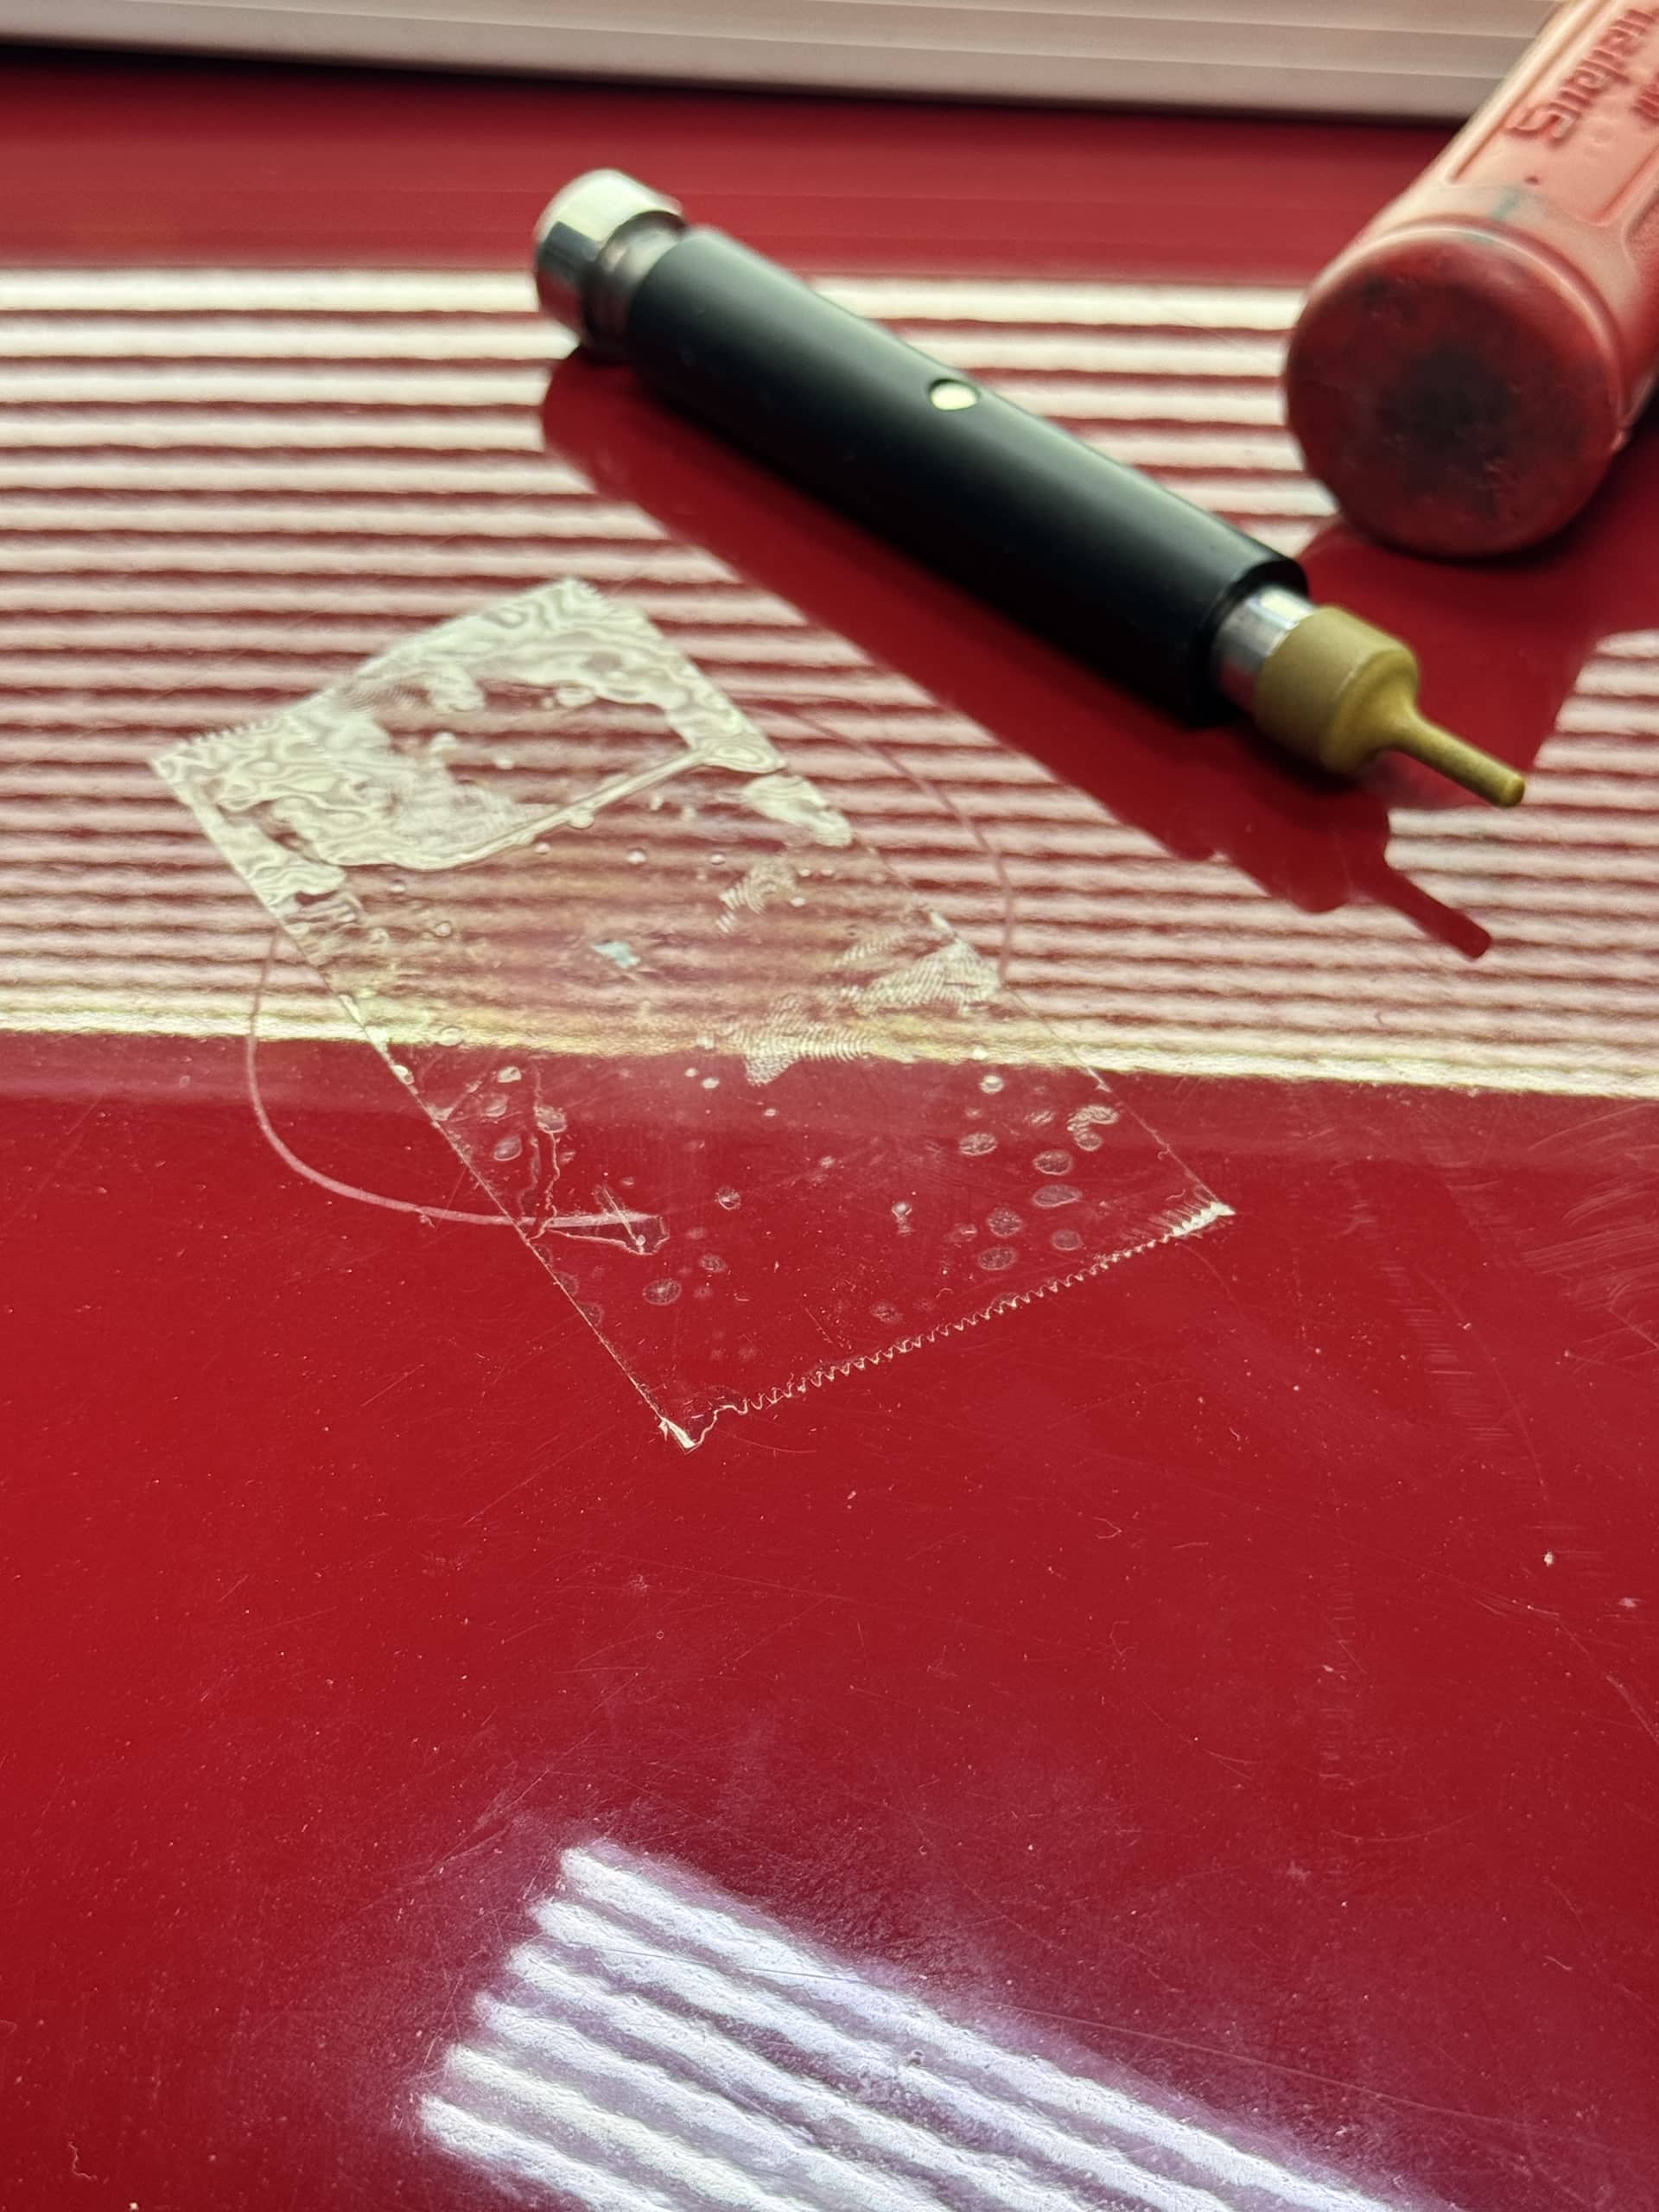
Step 4: Bringing It Back Up — Controlled Precision
With the high spot now intentionally low, it was time to reverse the process.
🔧 TECH NOTE — Tool Cushion Technique
The problem: Working under hoods and decklids, your tool tip can scratch the underside paint. On a BMW M5, that’s unacceptable.
The solution: Tool cushion — specifically, thick plastic backing sheets from dry sandpaper (also called “tolecut” sheets).
Credit where due: “Hudson suggested using tool cushion. It’s one of those simple tricks that saves you from expensive mistakes.”

Bladed double bend tool — precision access under the hood panel
Tolecut sheet applied to underside — keeps tools from scratching the back panel
Tool cushion (tolecut backing) protects the underside from scratches
Controlled pushing — bringing the metal back up gradually
Step 5: Iteration Until Perfection
This wasn’t a one-and-done process.
“You tap down, you push up, you check. Still not right? You do it again. And again. The first push won’t make it perfectly flat — you’ll still have unevenness around the edges. You play that back-and-forth game until it comes out right.”
Each cycle:
- Tap down any new high spots that form
- Push up the lows
- Read the reflection
- Cross-check from multiple angles
- Adjust and repeat
Reading while pushing — watching the lines flex in real-time

The iteration cycle — tap, push, read, repeat
The shallow pool — the reflection shows flat, symmetrical lines
The Result: Beyond What Anyone Expected
Final result — the “pimple” is gone, panel is flat and symmetrical
The customer was stunned.
“He didn’t think I could get it half this good,” Myke recalls. “He was ready to paint it. He said he could live with just a minor touchup instead.”
What was achieved:
- The giant bullseye — the “pimple” right in front of the BMW emblem — was gone
- The panel was flat and symmetrical from every angle
- Reflection lines were straight as possible
- The only evidence remaining: the original paint chip where the impact was most severe
What the customer saved: $2,000+ in body shop costs, plus the paint match and blend issues that come with respraying a BMW hood.
Learning Path: When Should Students Attempt This Level?
🎓 FOR PDR STUDENTS AND TECHS
Myke is clear: this repair wasn’t for beginners or even intermediate technicians.
The progression path:
Level 1 (0-6 months): Master small, simple door dings. Learn to finish cleanly. Develop your eye.
Level 2 (6-12 months): Work on standard high spots — soft, gentle highs that tap down easily. Learn the basic push-tap rhythm.
Level 3 (1-2 years): Moderate high spots on good paint. Begin working with compromised paint situations.
Level 4 (2+ years): Severe high spots like this BMW. Requires perfect tool control, understanding of metal memory, advanced reading skills, and knowledge of when to walk away.
“You can pick your friends, but you can’t pick your dents. And you’re never truly ready when you’re learning PDR. You’re going to fail — a lot. You have to understand that.”
“Every big dent comes down to small dents. If you don’t know how to finish a small dent clean, you’ll never finish a big dent. The fundamentals matter.”
— Myke Toledo
The Dent Time Standard
This BMW M5 hood represents everything Dent Time stands for:
Technical mastery — Knowing the techniques that turn “impossible” into “challenging”
Creative problem-solving — Clear tape. Leather-tipped knockdown. Tool cushion. Simple solutions to complex problems.
Willingness to try — When others walk away, we work the problem
Honest assessment — We don’t promise miracles, but we deliver what’s possible
The result? A customer who thought he needed a new hood, walking away with a flat panel and a minor touchup.
Technical Summary
| Aspect | Detail |
|---|---|
| Damage type | Severe high spot with paint compromise |
| Primary technique | Reset method (tap past flat, bring up clean) |
| Knockdown setup | Metal tap-down with leather buffer |
| Reading aid | Clear packing tape over damaged area |
| Protection | Tool cushion (tolecut backing) under panel |
| Tool type | Bladed double bend for hood access |
| Key concept | Work-hardened metal requires stress release |
| Time investment | Multiple hours, iterative process |
| Risk level | High — advanced technique only |
Complete Photo Gallery
Full visual breakdown of the BMW M5 hood high spot repair process:
Frequently Asked Questions
Can paintless dent repair fix a high spot with broken paint?
Yes, but with important caveats. When paint is already cracked or chipped, PDR can still flatten the metal, but the paint damage remains. In this case, the high spot was completely removed, leaving only the original paint chip that could be touched up. The key is preventing further paint damage during the repair.
What is a high spot in PDR?
A high spot is an area of metal that has been pushed outward, creating a bulge or peak. Unlike a typical dent, a high spot protrudes from the panel’s normal surface. High spots often occur from impacts from behind and are more complex because the metal is work-hardened and stressed.
Why do you tap down a high spot lower than flat?
Severe high spots create work-hardened metal that retains memory of its crushed position. Tapping past flat breaks that memory and releases tension. Attempting to finesse a severe high without resetting it leads to hours of frustration and poor results.
Is PDR better than body shop repair for high spots?
PDR is the superior repair method because it preserves your factory paint — the paint that was baked on at the factory and will never be matched perfectly in a respray. While this BMW M5 hood was quoted at $2,000+ for a body shop respray, the real value of PDR isn’t just the cost savings. It’s keeping your original finish intact, avoiding paint match issues, and maintaining your vehicle’s resale value. PDR often costs less than traditional body work, but the true benefit is the quality of the repair.
Can beginners learn to repair severe high spots?
Not immediately. Severe high spots with compromised paint require advanced technique, tool control, and the ability to read complex reflections. Master small dents first — every big dent comes down to small dents.
Have a dent others said can’t be fixed?
Text us photos for a free estimate →Interested in PDR training? Learn the fundamentals that make impossible repairs possible. Schedule a consultation.
— Myke Toledo, Dent Time
35 years in PDR. Still learning every day.
Repair Gallery
Get Your Free PDR Estimate
Text us photos of your dent — a technician replies within minutes.
858-408-6200Dent Time — Escondido PDR Shop & Mobile Service — Since 1991